Ask Andrew: Making Proper Connections
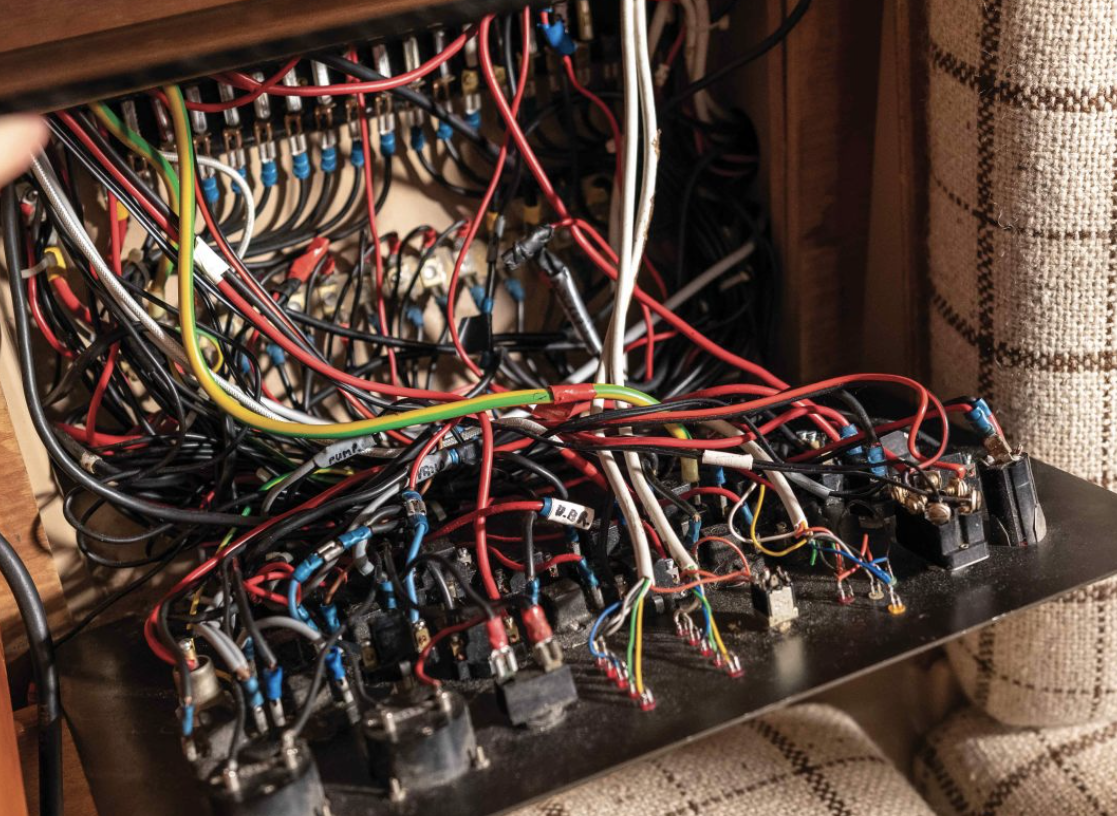
I get a lot of calls for electrical repairs. Not upgrades or installations – the requests are to repair what’s already there. Sometimes it's because something has stopped working, and the mess of wiring, repairs and additions over time; the mysterious nature of electrical problems prevent the boat owner from tackling this on their own.
Other times something has created a safety concern – something has gone wrong, or the current owner has become nervous about what’s been done before and how safe it is (or isn’t.)
One of the issues facing the marine industry today is the lack of standards: If you buy a new boat, you can be fairly assured that the mechanical and electrical components onboard are safe, installed correctly, tested, and designed for marine use.
Twenty years later, the same boat has outdated technology; multiple owners or technicians have added or removed items, or jury-rigged what once worked, in order to make it function according to their own understanding and skillset.
Unlike in a house or a commercial building, there is no electrical code on a boat. There are no laws or rules or procedures that must be adhered to in order to make the installation or repair ‘to code.’
Rather, there are a number of organizations (such as ABYC – The American Boat and Yacht Council – www.abyc.org) who have determined the best practices in the marine industry and have prepared a book of standards. In both the US and Canada these standards remain voluntary however.
As a boat owner, how do you approach an electrical repair or installation? How do you ensure that it’s safe. The short answer is: There isn’t a code. So follow the manufacturer’s recommendations when installing or repairing an electrical component. But, it’s rarely that simple.
On the other end of the spectrum, I’d love to recommend that you join ABYC, pay a yearly membership, download the standards, study them and learn to apply them to all aspects of boat repair. If you’re not prepared to take that plunge, perhaps hire a contractor who is certified through ABYC in marine electrical.
The reality for most of us lies somewhere between these two opposites: A list of principles that should be followed when installing or repairing electrical component on a boat – in a simple and practical way – that allows boat owners to tackle their own repairs, while feeling confident that the repair is safe, functional, and will last.
Here’s a brief list of ‘Do’s and Don’ts’ based on what I see regularly:
Do:
- Choose an appropriate size and type of wire – the size of wire that you choose is based on a few factors: the distance that the appliance is from the power source, the amount of current that the appliance draws, and the temperature rating of the wire itself. ABYC publishes Ampacity Charts that detail the size of wire that should be used, based on these factors. Using undersized wires can cause them to overheat, creating a fire hazard. Beyond wire size, ensure that you are using multi-strand wire. A solid core copper wire (the stuff used in houses) will not stand up well to vibration, and is not designed to be connected using a crimping tool. A multi-strand wire is the ideal for marine use.
- Choose the right sized fuse or breaker – this is the device the protects the circuit from overheating, creating a fire hazard. In theory, a fuse or breaker is designed to stop the flow of current through the wiring, if that current exceeds a pre-set amount. This is determined by backtracking: How much current does a device draw? How much current can the wire handle? How much current would cause overheat or fire hazard? The fuse/breaker should be chosen a an amperage rating to break or trip before the wiring overheats. Using an oversized fuse or wire gauge to avoid nuisance trips defeats the purpose of this device.
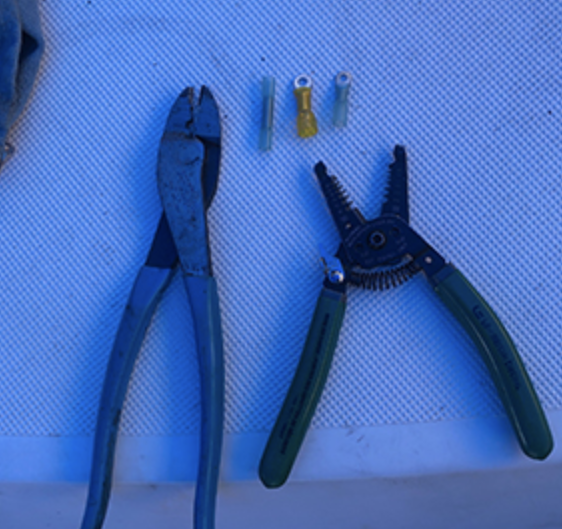
- Use the right type of connection – wiring should be connected using crimped connections. When connecting wire to wire, a crimped butt connector should be used. At the termination of a wire, a ring terminal should be used (rather than a spade or press terminal) – this ensures that the connection stays secure even if the wiring is pulled or if there is excessive vibration.
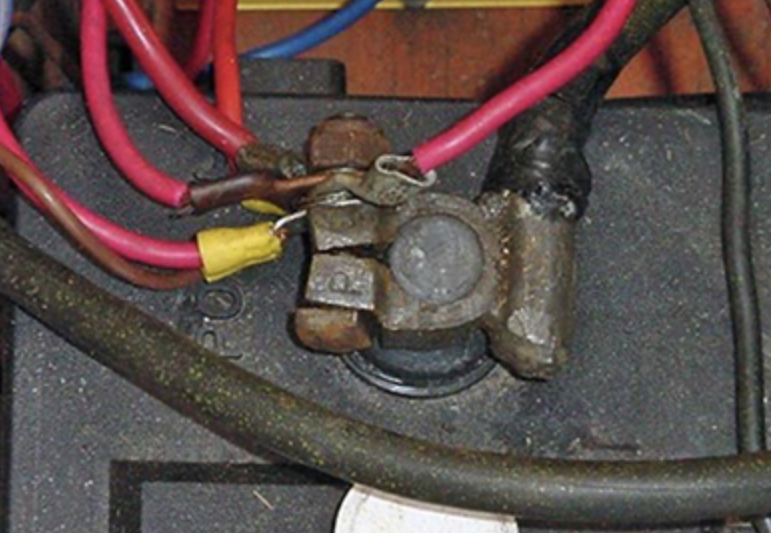
- Pay attention to battery terminals – connections at the battery should be sized to the battery post. A ring terminal or lug should be used to ensure that the wire is secure. Any/all battery connections should be secured with a battery nut (as opposed to a wing nut), and the battery terminals should be covered to prevent accidental spark (Insurance companies are big on this one, and crack down after survey’s are submitted)
- Use appropriate colour coding whenever possible – this is a courtesy for the next person working on the boat. Pay particular attention to positive vs negative wiring: On boats with only DC power (battery power), Positive should be red, negative should be black. However, in order to avoid confusion, on boats with both AC and DC power, DC negative should be yellow. Why, you may ask? This differentiates the DC negative from the AC hot wire (also black).
- Tighten connections with the appropriate tool – use an appropriate crimping tool, and ‘pull-test’ each connection that is crimped, to ensure that it is strong. For battery lugs and higher gauge wires, use an appropriate tool to ensure that the lug is secured to the wire
- Secure the battery and secure shore power cables – Ensure that the battery is secured in a battery box or tray, to avoid tipping, spilling or loosening of cables. Ensure that when connecting to shore power, that the cable connects well with the receptacle, and that it is twisted and locked into place.
Don’t:
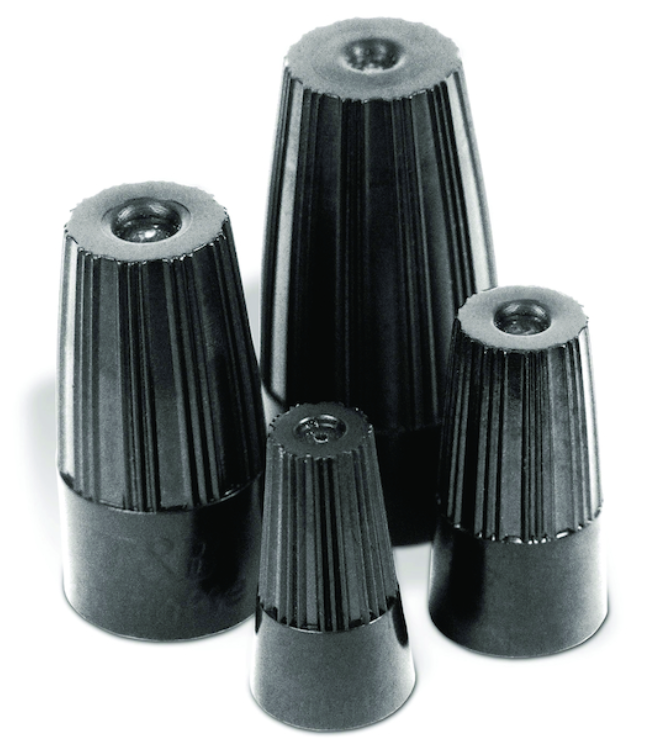
- Use ‘Marr’ type connections, or solder connections. Marr connectors are designed to join solid-strand copper wires in household applications. They are not ideal for sure on a boat where moisture and vibration can loosen the connection. Similarly, soldering was the standard a number of years ago to provide a secure connection – however, soldering turns a multi-strand wire into a single-strand wire, which doesn’t stand up well to vibration. Use butt connectors and multi-strand wire instead.
- Wrap stuff in electrical tape – It doesn’t stand up well in the marine environment, and is messy for the next guy. Use shrink-tubing and appropriate spiral loom to secure wires, instead.
- Leave potential for spark – ensure that connections are tight. Ensure that they are made using appropriate connectors and wire. Use boots to cover any exposed studs to prevent accidental arcing. Protect yourself and your tools as you work, to prevent accidents.
Electrical work can be tricky, but very rewarding as an upgrade or repair project. With proper planning, tools and equipment, I would encourage you to take on your own installations and repairs. I would also encourage you to seek advice for authoritative bodies (like ABYC), or from your friendly neighborhood marine repair tech.