Deck Repairs: Stopping Leaks Early is Key
When we joined the Barnet Sailing Co-op last year we were thrilled with the idea of going from one couple owning one boat, to being part of a team of 70ish people who share the upkeep of a matched set of six Catalina 27s. Many hands make for light work as they say. Though I’m pretty sure the person who said that never took part in late winter haulout… Still, the benefit of taking care of a fleet is that if one boat has a maintenance issue, chances are the other boats do too. And by the time you’ve made the same repair two or three times, you’re practically an expert.
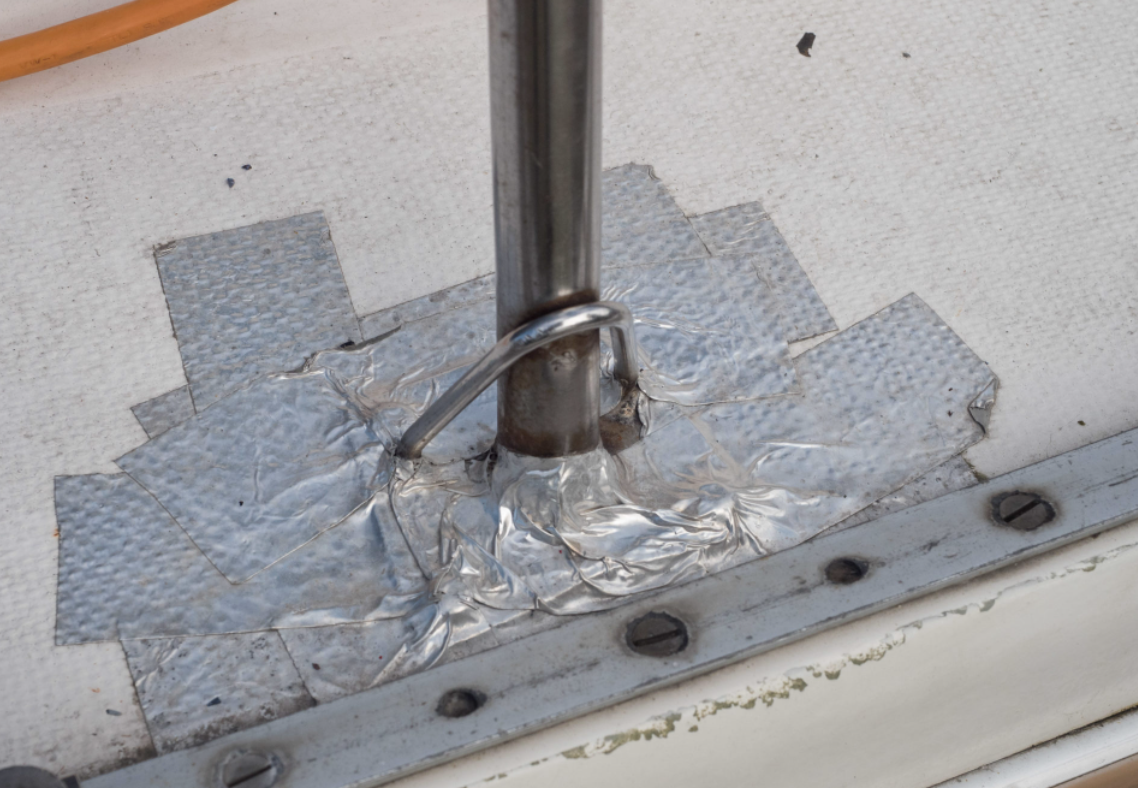
This is why I wasn’t worried when I saw the aluminum foil tape on the base of one of SV Honeybee’s stanchions. Although the “water leak” note (written inside, beneath the stanchion) seemed to concern one of our newbie co-owners, we were able to reassure him that deck repairs are typically quite straightforward.
Boats Leak
The thing is, boats leak. They are large, flexible structures that experience considerable stresses and loads. Many of these loads occur at the points where hardware is attached to the deck. As time goes on, the sealant compound used to bed the hardware loses flexibility and breaks down. The deck flexes just enough to break the seal and one day we’re making a tape patch to keep things dry until we can make the fix.

Stopping the water quickly, even if it means cleaning up tape residue (duct, gorilla or foil tape will all work) later helps keep the water from breaching the top skin of the fiberglass. Once this happens, it travels the path of least resistance. In some cases this means it goes straight through, but with improperly prepared holes the water can travel along the core (turning it into a soggy mess), then it take a detour through the interior liner before it makes a random appearance inside the cabin.
Common Deck Issues and Their Fixes
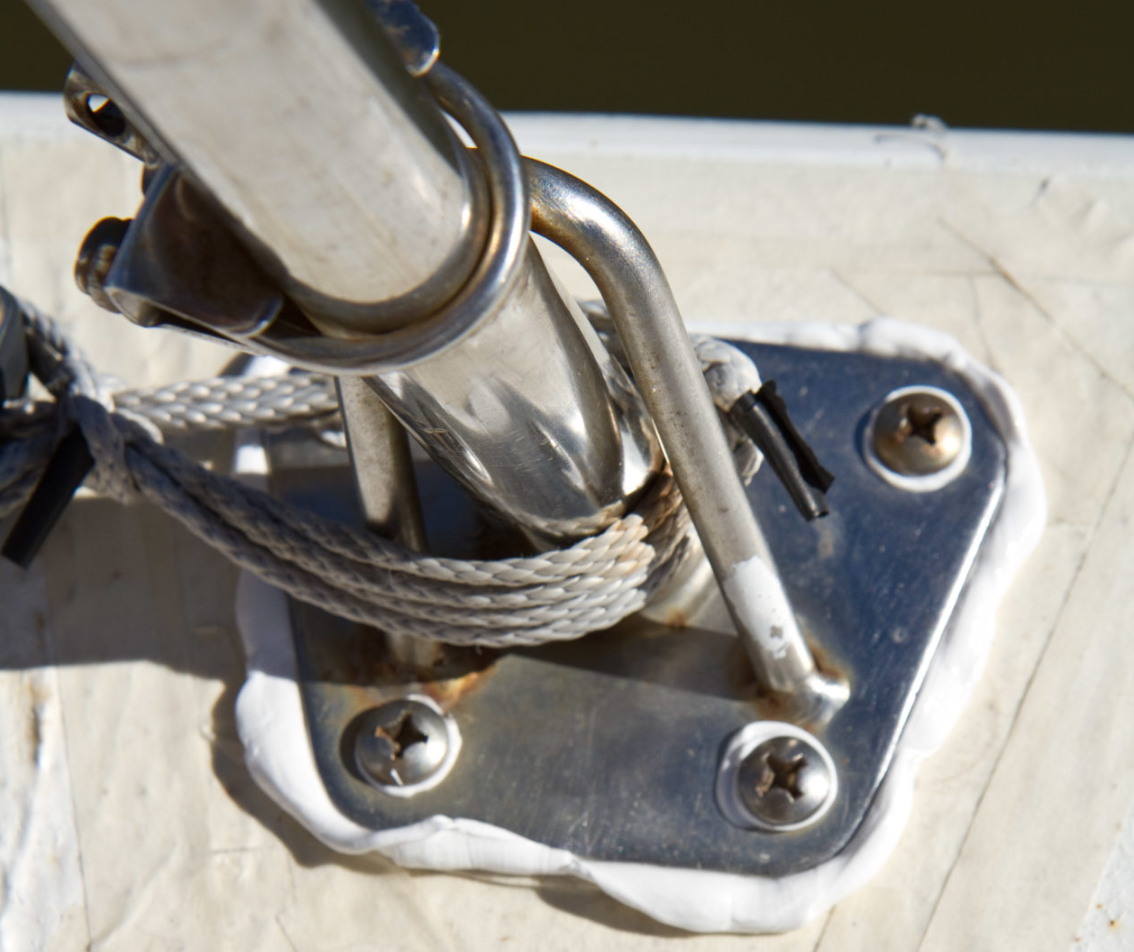
Stanchion bases and Deck Hardware
Every time a guest heaves himself up onto the deck using your stanchion for leverage, he’s increasing the possibility that the stanchion’s attachment point to the deck will spring a leak. Stanchions and pulpit bases are often undersized or have inadequate backing plates for the work we ask them to do. But even cleats, sail tracks and dodger bases may start to leak over time as caulking deteriorates.
The Fix
If we’re lucky, our boat was constructed so that the deck hardware was attached to solid fiberglass and not a cored deck. If this is the case, just need to clean out the old bedding compound and redo it with fresh sealant. To help make fasteners more leak-proof, countersink the holes. This leaves space for some additional caulking to form an O-ring of sealant around the fastener that won’t be squeezed out when the hardware is tightened.
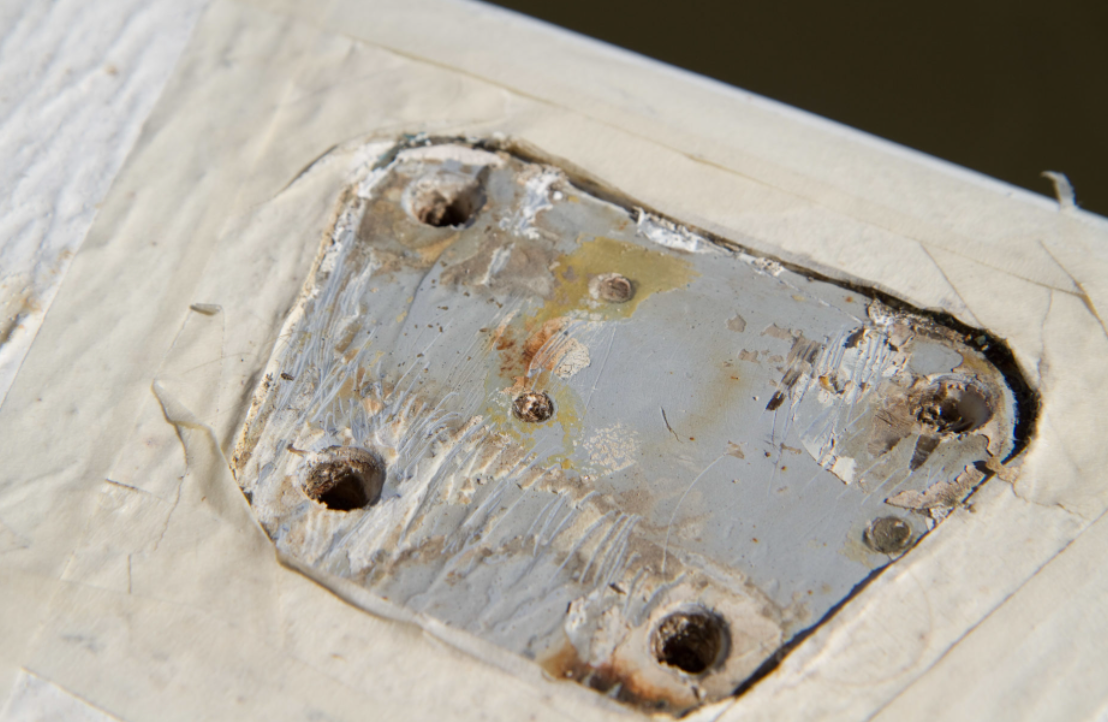
An important additional step is to include a backing plate if there isn’t one. The backing plate helps distribute the forces. Plates can easily be made of aluminum, stainless steel or fiberglass. Avoid plywood because it can compress or rot.
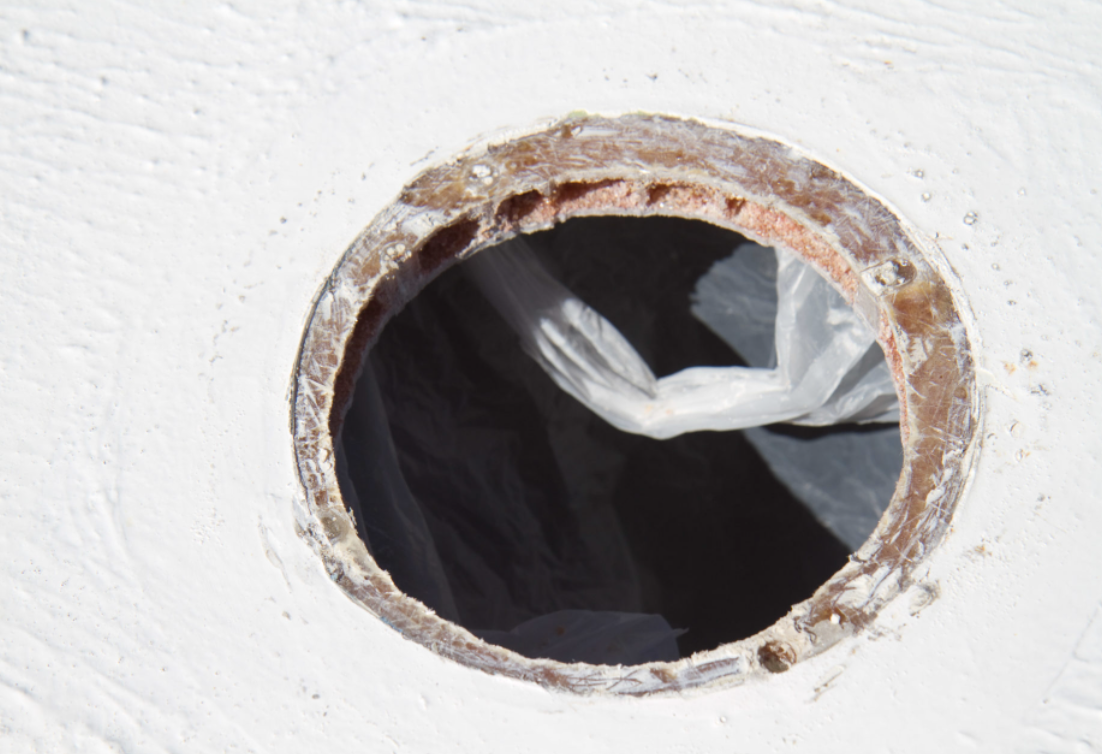
Pre-existing Holes
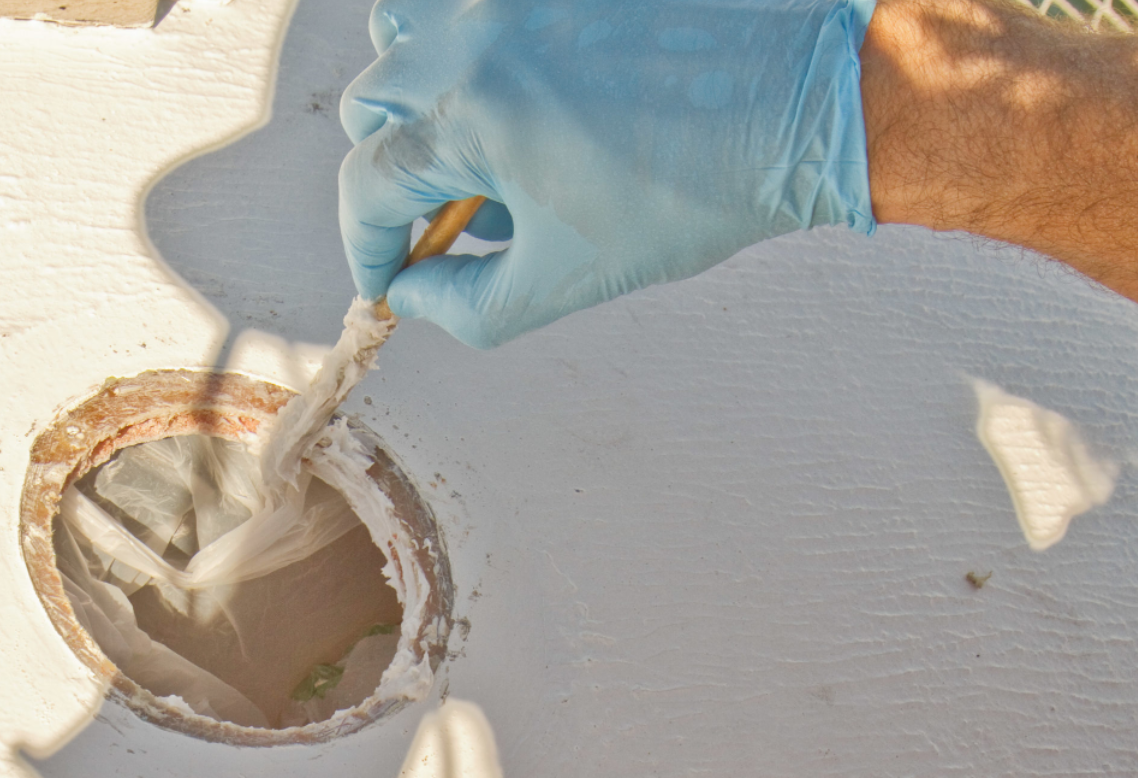
Many boats have holes that someone drilled in the deck for one purpose or another and never repaired properly. Often they are filled with putty or caulking, which over time cracks and loosens. These holes may be quite obvious or they might be hidden under deck hardware. Either way they can start leaking over time.
The Fix
The first step is again to dig out all the old caulking. If the deck is cored, drill a slightly larger hole to expose new deck material. Check the core to make sure it is dry. If there is dampness, dig out that core material from between the upper and lower fiberglass skins until you reach dry material. Clean the area with acetone then tape off the bottom of the hole. Slowly fill the hole with epoxy thickened with colloidal silica. Apply a dot of paint on the cured resin to match the gelcoat color as best you can. Keep in mind that gelcoat repair kits aren’t much good for this application; gelcoat doesn’t stick well to cured epoxy.
Hatches, Windows and Ports
Hatches, windows and ports often begin to leak over time. Check the gasket first. If it’s old or damaged, it won’t compress and seal and is the most likely leak source. Also check any hatch dogs or hinges that go through the lens. Some dogs have O-rings that allow them to rotate and these O-rings need regular lubricating with silicone grease.
If there’s still a leak after the gasket and O-rings are serviced, it’s probably safe to assume the caulking/bedding is too old and it’s time to re-bed the hatch. The least likely reason for a leak is the caulking that holds the hatch pane in place has failed. This is usually an obvious leak to find.
The Fix
If water is leaking in from around the hatch or window frame, you’ll need to unbolt the entire assembly. Next, scrape off the old caulking from the deck and frame. Use an oversized drill and drill out the fastener holes. Make sure the core has been sealed with thickened epoxy. If unsealed core is visible, dig it out to a depth of 10mm and fill the space with thickened epoxy. Be sure to fill the bolt or screw holes with epoxy too. When the epoxy is set, set the hatch or port in place and drill for the fasteners.
Caulk the hatch and deck with a generous amount of caulking after taping off the surrounding deck. Set the hatch or port in place and bolt it down without fully tightening the bolts. Only after the caulking has set and formed a waterproof gasket, should you tighten the bolts fully.
How quickly you need to find and fix a leak is a matter that is up for debate. Some boaters claim that boats leak and that you can never get ahead of the problem. In contrast, some surveyors tend to treat each leak as a catastrophe in the making. The truth probably lies between these two scenarios. With both of our boats we quickly tired of leaks and now with our club boats we believe in methodically working our way through all the deck hardware, hatches and ports—drilling, filling and rebedding. It takes time and effort but it doesn’t take long to become an expert. And by lessening the stream of water that invades your boat’s interior you’ll make boating more fun.
Tips
Don’t apply new caulking around a leaking fitting. It seldom works. Remove the fitting, and use new caulking.
When possible use nuts and bolts and not screws. Screws are more difficult to get a good leak proof seal with and are not as strong as nuts and bolts for holding down hardware.
Caulking
Silicones Many people avoid silicone because it can contaminate future paint jobs. But it’s a good choice for plastics that are not compatible with other caulkings. Dow Corning 795 is a high-strength adhesive silicone that should only be used to bond plastic windows.
Polysulphide One of the most versatile and longest lasting of the caulkings, it can be sanded and painted after it is cured, but don’t use it with plastics. 3M 101 or “Lifecaulk” are common brands.
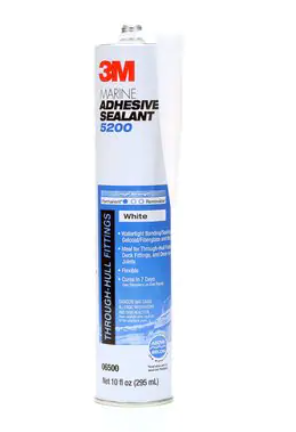
Polyurethane Avoid use on plastics because it will melt ABS and Lexan. 3M makes a few well known types such as 5200. It forms a tenacious bond and is used by boat builders to attach the deck to the hull. The strength of the bond means it should be avoided for most deck hardware because when it begins to leak it will be difficult to remove the hardware. 3M 4200 is more caulking than adhesive and is a better choice for most hardware. Both of these come in normal cure and “fast cure” varieties. The fast cure has a shorter life after opening but cures much faster.
Sikaflex 291 is an adhesive/caulking similar in strength and use to 3M 4200. 292 is a much higher strength adhesive like 5200 that can also be used as a caulking. Use it to attach something you never want to remove without lots of effort.
Sikaflex 295 is the special-purpose Sikaflex caulking used to bond plastic windows in place. It needs a special primer. Sikaflex 296 is similar to 295 but should only be used for mineral-glass windows.
Polyether These newer sealants are weaker than polyurethanes but are very resistant to exposure. West Marine “Multi Caulk” or 3M 4000 UV Polyether sealant are representative brands of this type.
Butyl tape comes in a roll and never really cures, staying flexible and soft for years. It doesn’t have any strength so only use it on fittings where fasteners are doing all the work.