Diagnosing and Repairing Boat Fuel Gauges
By Martin Frobisher

Fuel gauges in recreational boats often malfunction, and they frequently seem to err on the side of optimism when it comes to fuel remaining in the tank. This obviously leads to inconveniences at best, disaster at worst. You definitely don’t want to run out of gas five miles from the nearest marina with a stormy night coming on.
Diagnosing and repairing fuel gauge issues is easiest with a systematic approach.
Here’s how to troubleshoot and repair common fuel gauge problems.
Understanding Fuel Gauge Systems
Fuel gauge systems in recreational boats typically consist of three main components:
1. Fuel Gauge: The instrument on the dashboard that displays the fuel level, usually analog but digital units are also available.
2. Fuel Sender Unit: A sensor located in the fuel tank that measures the level of fuel and sends this information to the gauge. These are often simple float systems on a stiff wire, or sometimes a sliding float on a metal shaft.
3. Wiring and Connections: The DC electrical pathways that connect the fuel sender unit to the gauge and the boat's power source—the 12-volt battery in most small recreational boats. As in all boat wiring, they’re subject to damp air, lots of vibration and in coastal use, salt corrosion.
Common Fuel Gauge Problems
1. Gauge Reading Incorrectly
o Symptoms: The gauge shows empty when there’s fuel in the tank, or it fluctuates erratically. Showing you have less fuel than you actually have is rarely a problem, but if it shows more than you have, you’re likely to run out of gas on the water. If you’re miles from a safe harbor without a good communication system, this can be big trouble.
o Possible Causes:
Faulty fuel sender unit
Broken or corroded wiring or loose connections
Faulty gauge
2. Gauge Not Working at All
o Symptoms: The gauge needle remains at the empty position or does not move.
o Possible Causes:
Power supply issues
Faulty gauge or sender unit
Blown fuse or wiring problems
3. Gauge Shows Full All the Time
o Symptoms: The gauge consistently reads full regardless of the actual fuel level.
o Possible Causes:
Malfunctioning sender unit
Short circuit in the sender unit or gauge
Diagnosing Boat Fuel Gauge Issues
Each of these problems has more or less distinctive clues that can direct you to a successful repair. Here are the steps to follow:
1. Check the Power Supply
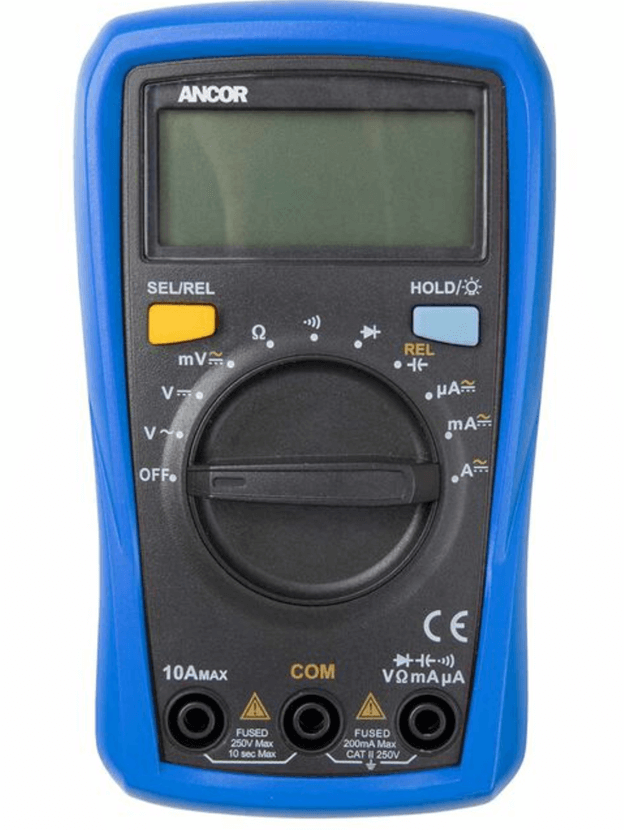
• Is the Gauge Getting Current? Verify that the gauge is receiving power. Use a multimeter to check the voltage at the gauge’s power and ground terminals.
• Is it Giving the Expected Reading? The gauge should receive a steady reading of about 12V (or 24V, depending on your system) from the boat’s power supply.
2. Inspect the Wiring and Connections
• Procedure: Examine the wiring between the fuel sender unit and the gauge. Look for any signs of damage, corrosion, or loose connections.
• Action: Repair or replace damaged wires and ensure all connections are secure. Clean any push-on connections with fine emery paper to assure good contact.
• Waterproofing: If you have to make new wire connections, use crimping style connectors with heat-sealing covers. Crimp them in place, then shrink them with a heat gun to seal—or alternatively, use a waterproofer like Liquid Electrical Tape—West Marine and others sell this.
3. Test the Fuel Sender Unit
The fuel sender unit is usually directly under a composite pie-style deck plate in small recreational boats designed for outboards. Unscrew the plate and the connections for the sender should be right there in front of you.
• Procedure: Disconnect the sender unit and test its resistance with a multimeter. The resistance should vary according to the fuel level.
• Typical Resistance: When the tank is full, the resistance should be low (e.g., 0-90 ohms), and when empty, it should be high (e.g., 240 ohms). The ohm signal on a multimeter looks like this: Ω. Check your boat’s specifications for exact values.

4. Check the Gauge
• Procedure: If the sender unit and wiring are functional, the problem might lie with the gauge itself. You can test the gauge by connecting it to a known good sender unit or by bypassing the sender unit to see if the gauge responds. Access is behind the console—be careful about punching around back there because you can short out other gauges if you’re careless with pliers and screwdriver.
• Action: Replace the gauge if it does not respond correctly to the sender unit's output.
Repair and Replacement
1. Replacing the Fuel Sender Unit

• Steps:
o Shut off the main battery switch so that no current can pass into the wiring while you are working on it. The slightest spark can mean disaster around a fuel tank.
o You probably will not have to drain the fuel tank since boat senders are nearly always located on the top of the fuel tank. Don’t take the old sender out until you are completely ready to install the new sender, and be sure no dirt gets into the access port when you remove the old sender. Remove the old sender unit by removing the screws holding it in place.
o Install the new sender unit and gasket, ensuring a proper seal to prevent leaks. Don’t tighten the screws excessively, though—they can be easy to strip.
o Reconnect the wiring and test the gauge.
o Replace the deck plate and tighten it securely—you don’t want rain or spray getting inside and corroding your new sender connections.
2. Replacing the Fuel Gauge
• Steps:
o Remove the faulty gauge from the dashboard.
o Disconnect the wiring and note the connections for the new gauge.
o Install the new gauge and reconnect the wiring. The diagram below or something similar will guide you to the appropriate connections. The three most important wires are the wire from the ignition to the gauge, the black ground wire to the battery, and usually a pink wire from the sender—this is the wire that delivers the fuel level info. There may also be a separate connection for the gauge light, usually a yellow wire.
o Note that the sender does not have a positive or red wire that goes directly to the battery, though it does have a ground or black connection to the ground bar or battery negative.
o Verify that the gauge is working by filling the tank full and then keeping tabs on fuel use. Hopefully, you’re back in business with a fuel gauge and sender you can trust.

Preventive Maintenance Tips
• Regular Checks: Periodically inspect the fuel gauge system, including the sender unit and wiring, to catch issues early.
• Avoid Corrosion: Ensure that all electrical connections are clean and free of corrosion. Use dielectric grease on connections to prevent moisture-related problems.
• Keep water out of your tank: Water can damage the metal parts of a sender leading to faulty readings. Old fuel can also cause sender issues—if you won’t be using your boat for months, add a fuel conditioner before final shutdown.
Conclusion
This is a job that most boaters can do on their own, but if access to the gauge mount or the fuel sender is difficult, or if the tank has to be drained to replace the sender, you may find it well worth paying a dealer to handle the job.
In any case, don’t continue to operate with an unreliable fuel gauge. If you do, sooner or later you’ll wish you hadn’t.