DIY Bimini Top Installation
My six-year-old Bimini top did not die quietly. One minute, we were motoring down Tampa Bay at 30 miles an hour in my SeaPro, eyes peeled for gulls that might tip us off to a mackerel school, the next there was what seemed like an explosion and the top was gone.
We later figured out what had happened. The bow stays or straps, weakened by years of exposure to the elements as my boat sat on the cradle at my dock, had suddenly decided that enough was enough. Both let go almost simultaneously, and the top then ballooned up like a parachute, catching the wind and quickly ripping the support screws for the top bows out of the inwales. The only thing that kept the whole thing from sinking was one good strap left on the backside of the top.
Time for a New Top
In retrospect, my buddy and I were lucky neither of us was hurt. One end of the main top support cut a gouge a foot (30.48 cm) long and a quarter-inch (6.35 mm) deep into the inwale as it was blasted backward by the force of the wind on the top; if that sharp-edged aluminum support had hit one of us, we would have been in for a trip to the emergency room.
Unfortunately, my failure to replace the straps now meant I needed a whole new top; the old one was shredded, and the bows were bent beyond reshaping. And getting another top installed by the pros meant I was going to have to pull the boat, trailer it to town and leave it to sit, probably for weeks, while I waited for the new top to be scoped out, ordered and then installed.
Fortunately, there is a better way to go, for those who don't mind applying a bit of their own elbow grease, and it can save money as well as time. Modular Bimini tops can now be ordered via the Internet, and anyone with a drill, a screwdriver and a Saturday afternoon to spare can install their own top.
I ordered my replacement from one of many online selections. The critical part here is getting the measurement for the top bow supports exactly right.
Measure Twice
The width is not the width of the boat, but the width between the inwales, for an inside installation, or from the screw points on top of the gunwales. The height can be whatever is desired to want within reason—just allow enough headspace for taller guests. And Bimini lengths, bow to stern, range from 4’ (1.22 m) to 8’ (2.44 m) with most providers; obviously, the longer the top, the more shade, but also the higher the cost.
There’s a selection of top materials and, generally speaking, the more durable the top, the more expensive. There are also plenty of colors to choose from; one that matches the trim of your boat is likely to look best, at least when new. Lighter colors weather less noticeably than darker colors, though, other things being equal.
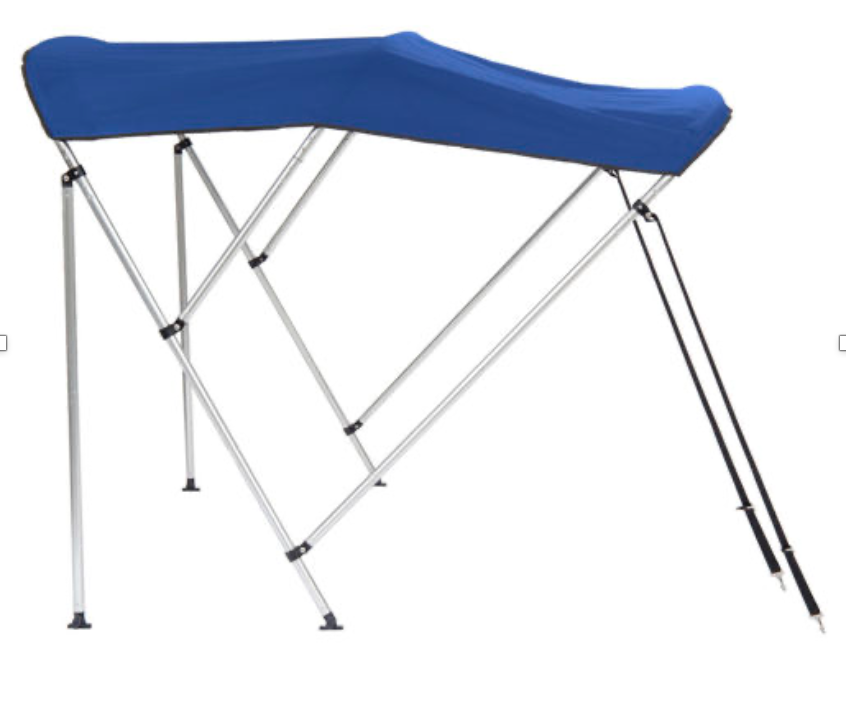
The top arrived in two boxes. One held the aluminum bows or supports, which take up little space until they are assembled because each comes in three pieces. The two support pieces are bent in 90-degree arcs, and the center connection, which holds the nylon top itself in place, is straight. Slide them together, align a couple of screw holes at each connection and secure them with number 12 aluminum screws. (Be careful not to over-tighten and strip the threads—aluminum is a soft metal.) My top, an 8-footer (2.44 m), had four bows.
The next step was to install the nylon top itself. I laid it out on the dock upside down and threaded each of the four top bows through the pre-sewn pockets provided. Slide on the support straps on each side during this step. Some fit in pockets, some are secured with a washered screw. Then it was time to complete final assembly, fastening the bows to each other with "eye ends", nylon fittings that fit on the end of the pipes and have a hole for the connector screw, and "jaw slides", which fit over the main support pipes and allow connection to the middle and front support bows.
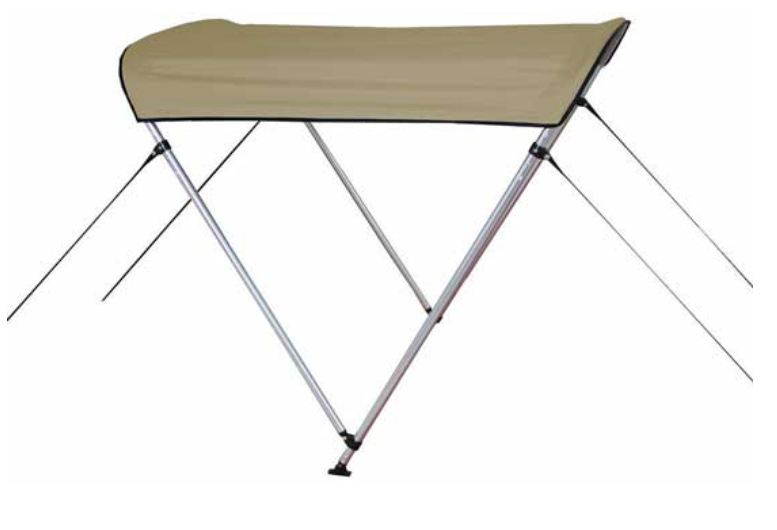
Once the whole thing is put together, you fold it up and set it in the boat. You'll need an assistant to help hold it in place. The new top may not fit exactly into the holes where the old one was located; lay the top down as far aft as possible, just forward of your outboard. This is where you want it to sit in the folded-down position so that it's out of the way when you're fishing. Just make sure to position it forward enough that it won't get bent if you tilt the engine up while the top is down.
Now, open the top and check its position, making sure it covers the console completely. Mark the location for the "angle hinges", which will attach the top to the boat’s gunwales. Measure carefully once the first side is marked so that the other side is exactly parallel-it's best to measure this from the transom or the bow, rather than eyeballing it. For a sliding track, this measurement is not critical.
Reinforce It
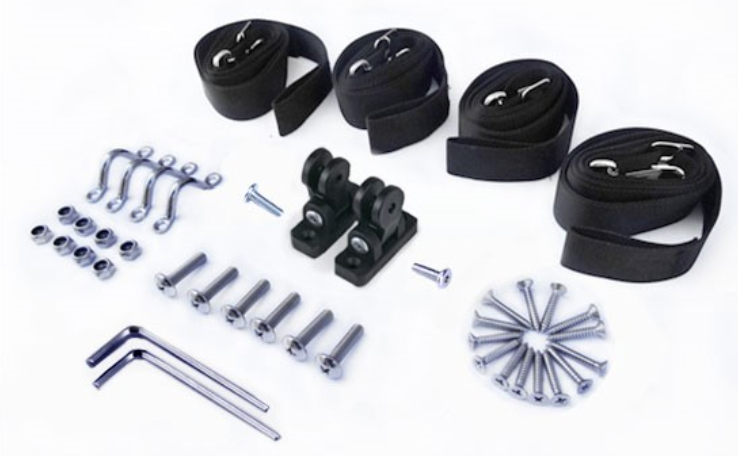
If there's not already a backing plate in place, add one about 4” (10.16 cm) square, made of 1/4 inch (6.35 mm) aluminum plate, ½” (1.27 cm) Starboard, or ½” (1.27 cm) plywood, provided there is open access—some linered boats won’t have it. An easy way to secure the backing plate is with a layer of Black Magic or another automotive-type two-part putty, which hardens in minutes.

You now drill 9/64" (.36 cm) holes for the mounting hardware. The pro way to do this is with a countersink drill bit to prevent chipping the fiberglass. It's best to use locking nuts on bolts for securing the top to the inwales, rather than screws, but heavy screws into backing plates are OK, too. Install the deck hinges and then set the eye ends of the long bows into these and you've got the top under control.
The last step is to locate the right spot for the tie-down straps. You do this by extending the straps out at about a 45-degree angle and then marking the spot where the strap meets the gunwale. It should be taut but not tight. Install the "pad eyes" or attachments for the tie down straps at these locations, fore and aft, again at exactly equal distance from the bow/stern, and you're done.
Price for the top? Around $650, which isn't pocket change, but it beats the heck out of the $1,150 a local canvas shop quoted for the job. Manufacturers say that tops kept folded and covered, or inside a garage, are likely to last 10 years or more, so the amortization is pretty easy.