Do You Know What Your Engine Oil Wants to Tell You?
Think of the oil in your engine like the blood in your body: You cannot survive without blood, and neither can your boat's engine. When you get a checkup, your doctor often orders a blood test to check your overall health. The same can be done for your engine.
According to BoatU.S. oil samples are best taken at regular intervals each year. These, for example, can either be drawn every 50 hours or, if the boat is only used lightly, just before winter layup, which is what I do. Doing an oil analysis yields a snapshot of one particular moment.
Although that can provide enlightening information, regular sampling is far more beneficial as it allows the boat owner or mechanic to monitor and track a specific engine during its lifetime. The first sample acts as a baseline to which you can compare future samples, giving you a good idea of what's going on in your engine or drive.
How to take an oil sample:
Taking an oil sample is pretty straightforward. The first step is to purchase an oil sample kit from a reputable supplier, usually the same place that will be analyzing the results.
You'll need just two items to take an oil sample: a small plastic container to hold the oil and a special hand pump for drawing the oil up through the dipstick hole. There are usually no instructions that come with the kit, so here's how to go about it.
Oil samples need to be taken with the engine at normal operating temperature. Any particulates contained in the oil sink to the bottom of the oil pan of a cold engine, but warm oil that has circulated throughout the engine will hold these particles in suspension giving a more accurate reading of the oil's condition and, by definition, the surfaces that it lubricates.
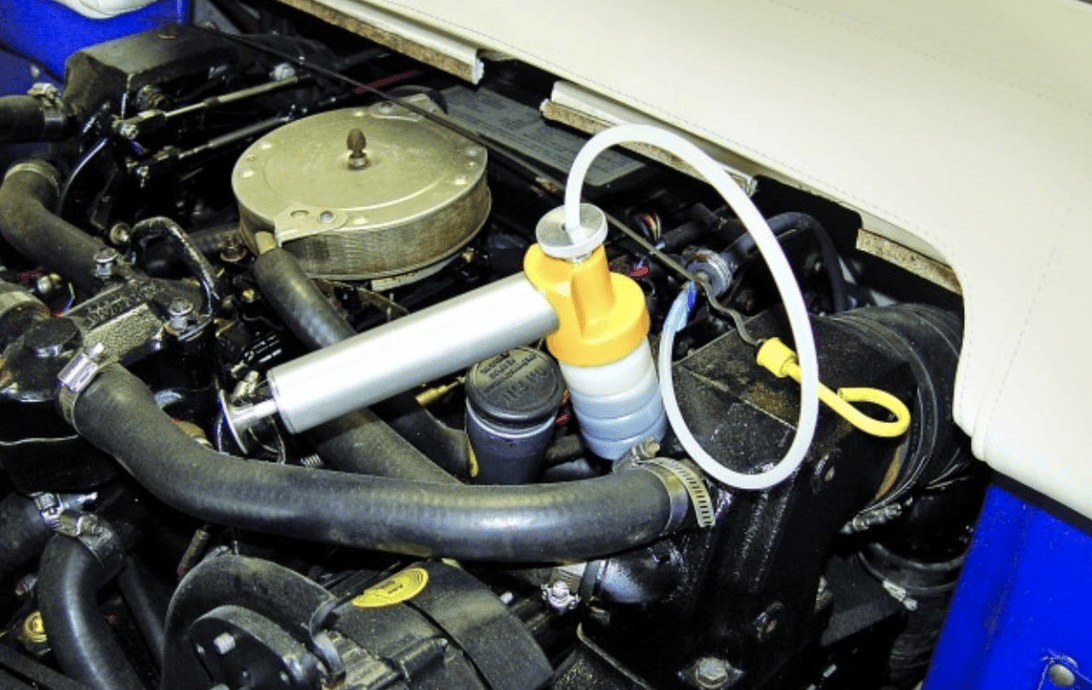
Shut down the engine once it has reached normal operating temperature and remove the dipstick. Insert the plastic tube that comes with the sample kit into the dipstick tube until it reaches the bottom of the oil pan. Then pull it back an inch or two so you are only withdrawing oil, not any gunk stuck to the bottom of the pan.
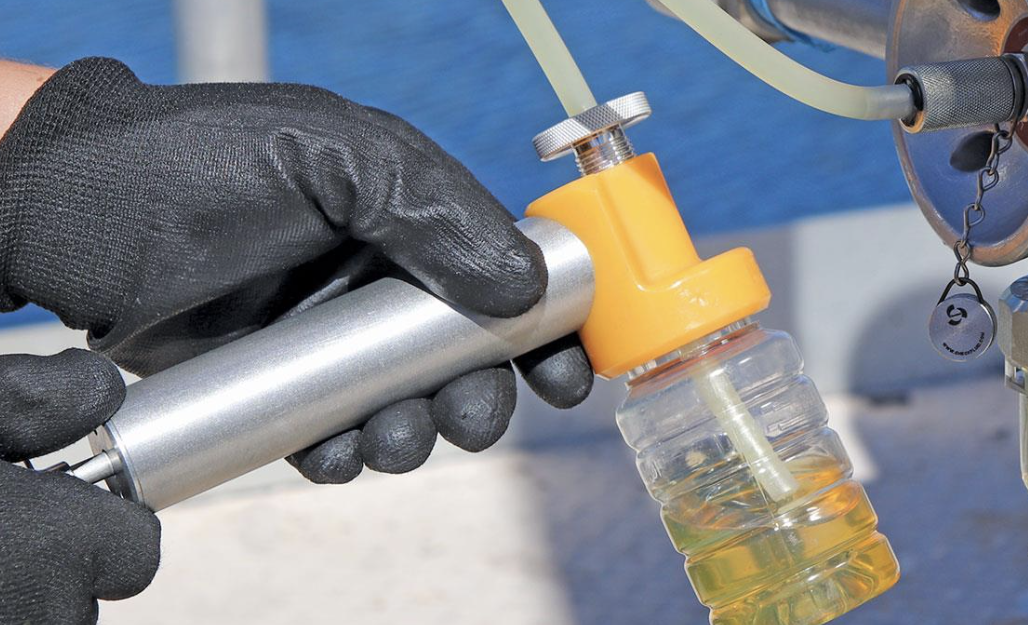
Insert the other end of the plastic tube into the oil sample pump, and then screw on the plastic collection bottle.
Operate the pump with slow, deliberate strokes to suck up oil from the engine. Keep pumping until the container is almost full. Place some rags under the pump to collect any drips. Once full, unscrew the oil collection container from the pump before immediately screwing on the cap. Be careful not to spill oil.
Remove the plastic tube from the pump, and after allowing any remaining oil to drain back into the engine, remove it from the dipstick hole and discard the tube. (Each tube is used only once to avoid cross-contamination.)
Fill out the adhesive label as thoroughly as possible with engine hours, serial number, and other requested information, and stick it onto the container. It's imperative to label each container immediately after taking the sample. If drawing multiple samples, it's all too easy to get them mixed up.
Once the samples have been taken and labeled, place them in the supplied envelope, box, or tube and mail them to the lab. You can expect to get the results via email within 72 hours.
TIP:
Be consistent when taking oil samples so you have a comparison from year to year. A good time to do it is when changing the oil in the fall.
Testing is high tech
Once oil arrives at the lab, it is divided up into smaller samples for different individual tests. One of these is the flashpoint test. A small sample of oil is heated until it starts to produce a vapor that can be ignited. Oil contaminated with gasoline or diesel has a lower flashpoint than an uncontaminated sample, which is valuable information.
Oil is also checked for metal elements by vaporizing the sample and sending it through a spectrophotometer, a machine that measures the amount of light that passes at different wavelengths. The results help the lab determine the amount of each metal present in the sample in parts per million (ppm).

Based on stored data, the lab can interpolate those results and what they may mean for each tested example. For example, excessive amounts of a certain metal could indicate that some component in the engine is experiencing wear, typically bearings or some other part.
Here are some of the most common trace elements found in oil samples and some of their likely sources:
Cu – copper from oil coolers and bushings
Fe – iron/steel from worn bearings or journals
Al – aluminum from pistons
Pb – lead from wear in the main crankshaft bearings
Na – sodium, most likely caused by antifreeze from the cooling system finding its way through a crack or pinhole and diluting the oil
Ni – nickel from crankshafts, valves, and camshafts
P – phosphorous typically comes from antiwear additives in the oil
Cr – chromium from cylinder liners and piston rings
Fuel – often caused by blow-by from the combustion chamber, which dilutes oil and makes it less effective
TIP
Every brand and weight of oil has unique characteristics. Only use oil recommended by the engine manufacturer. Using different brands or viscosities may skew analysis results.
How much does it cost?
Presently, the lab cost for professionally conducted oil sample analysis is about $30. Although there are DIY sample kits where drops of oil are placed on special sample cards and then compared to a supplied colored reference chart, these are a poor substitute for pro-testing.