Gearcase Maintenance
By John Tiger
Your boat’s drive unit (lower unit, gearcase, foot, etc.) is a critical component. Without it, your boat doesn’t go. While maintenance may seem easy, there’s a lot to check when servicing your engine’s gearcase. If you’re not mechanically inclined, it’s best to have your dealer do the job.
A simple fluid drain and refill starts the process, but while you’re doing this, it makes sense to check the unit over completely and reduce the chance of some type of failure later on.
Fluid Drain and Fill: What's Needed
The proper type and weight of gear lube is necessary, of course; check your owner’s manual first or see your dealer. Since the lubricant must be pumped up from the fill port to the vent port, a lubricant pump is needed; small pumps with the correct amount and type of lube can be purchased from your dealer.
The fill and vent ports each have gaskets; these can be plastic, fiber, or O-ring style depending on the year, make, and model of engine. Since they can tear and become leaky over time, pick up a replacement pair of gaskets when purchasing the lube and pump. You’ll also need a drain pan and a good stash of disposable rags.
Check your engine to see what tool is needed to remove the drain and vent plugs; typically, it’s a large, flat blade screwdriver, but could also be an Allen wrench—again, depending on engine year and model.

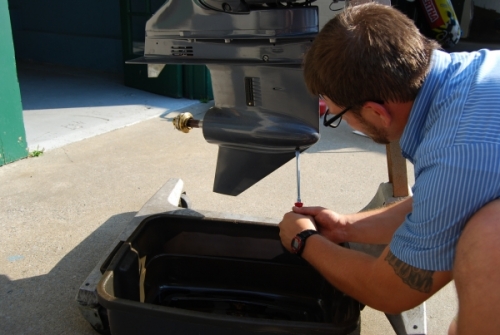
Draining Exercise
Tilt the engine down so it is as close to vertical as possible. Place the drain pan under the skeg and remove the fill and vent plugs. Allow the unit to drain while examining the color and appearance of the lube. Here’s what you’re looking for:
- Normal lube in good condition appears amber, blue, or red depending on the manufacturer’s dye. It will drain evenly from the fill port, with no chunks, water, or burnt odor.
- Burned lube has a powerfully rank odor, is black in color, and flows faster because it’s thinner than usual.
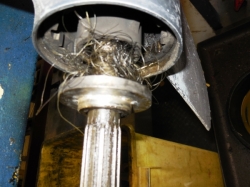
- Here’s where to pay attention: If there’s impending gear and/or bearing failure, burnt lube is accompanied by large metal shavings that cling to the magnetic tip on the drain screw. In a normal wear and tear situation, these shavings will be very fine in consistency, and the amount will be minimal.
- Water-contaminated lube (most common!) has minimal odor but appears milky, like coffee with cream. This indicates a water leak somewhere, usually at the propshaft seals. The milky lube may be preceded by actual water draining out before the lube; this indicates the seals are badly compromised. If your lube is contaminated this way, your gearcase needs to be resealed.
Don’t leave it with milky lube in it for long! The water in the lube will create havoc in the unit, rusting bearings, gears, and shaft surfaces and causing eventual failure. If you notice the milky lube when draining before winter layup, try to get the unit resealed and filled with fresh lube before you put the rig away. If you just can’t do that (or your dealer’s too busy), at least refill with fresh lube before storing for winter.
Refilled and Refreshed
Give the unit time to drain completely. Prepare to refill by positioning rags and your tools around you so you’re not scrambling for them as the fluid fills the gearcase. Place the new gasket washers on the fill and drain plugs. Start by filling the unit from the fill port, pumping the fluid up into the unit slowly to avoid air bubble buildup. When the lubricant begins to flow out of the vent port, stop and replace the vent plug. Pull the fill nozzle out of the lower fill port and replace the fill plug. Try to minimize the lubricant loss by doing this quickly. Wipe up any spilled lube, give both plugs a last tighten, and you’re done.