Getting a Handle on Seacocks: How to Keep Them Operating
Like any equipment located out of sight in the dim recesses of the bilge, seacocks generally receive little thought or attention — until they fail. Here are some inspection and maintenance tips to help keep any boat’s seacocks ready, willing and able.
Know the Difference
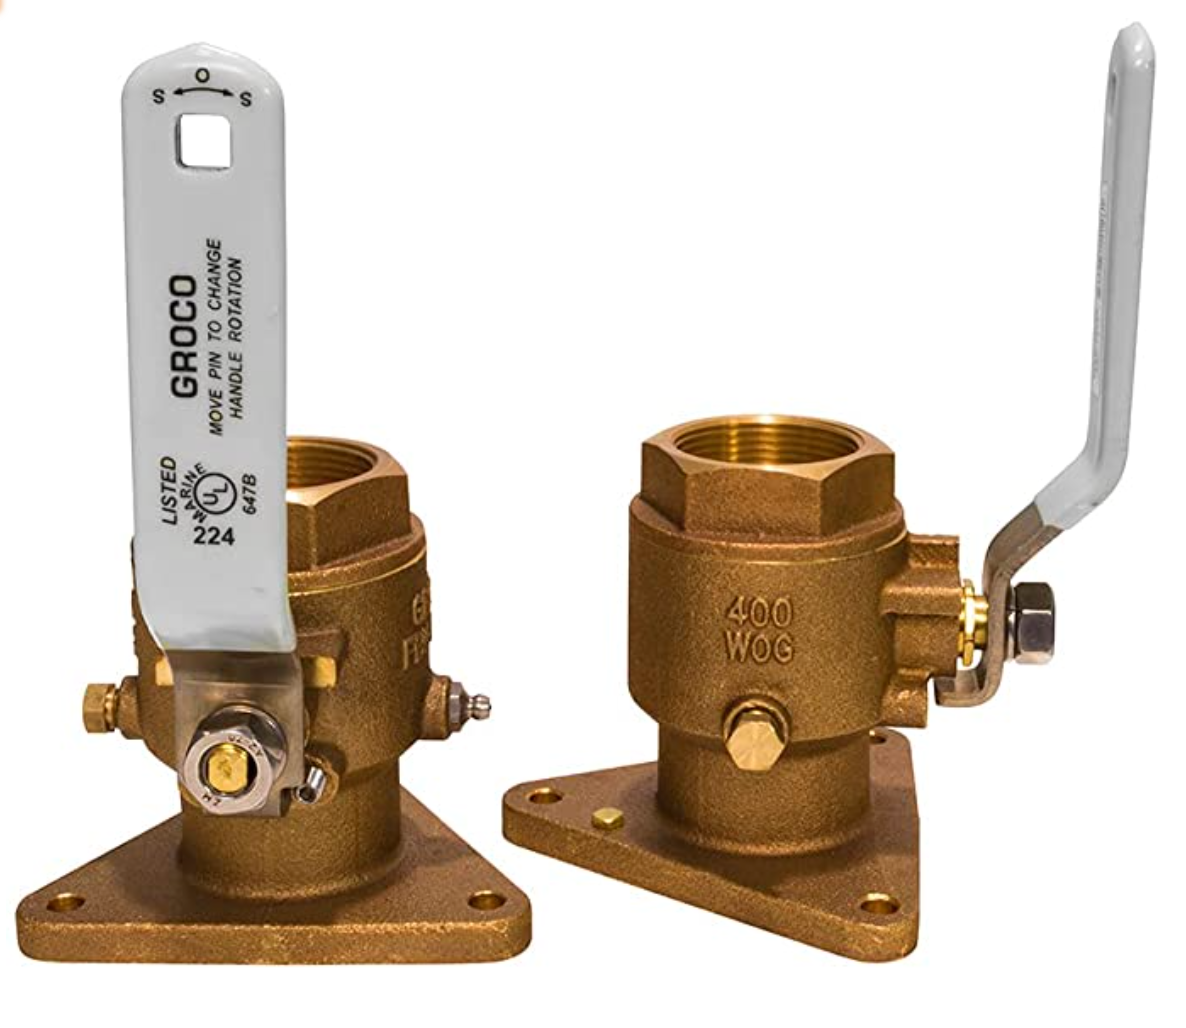
The most common seacock types are tapered-plug, expanded-rubber-plug and ball-valves. Gate valves are notorious troublemakers and not recommended for use as seacocks. Not only are the worm gear and associated guts of the thing prone to corrosion and failure, it’s also possible for trash to prevent the gate from closing. And unlike proper seacocks, it is impossible to visually confirm that a gate valve is fully open or closed.
Un-flanged ball valves that are screwed directly onto a through-hull are also fairly common, although this isn’t really an acceptable practice. Modern ball-valve types featuring a supportive flange (like the traditional tapered-plug units) are a much better option.
Material-wise, seacocks will be of either marine grade bronze or composite construction (Marelon® for example).
What to Look For
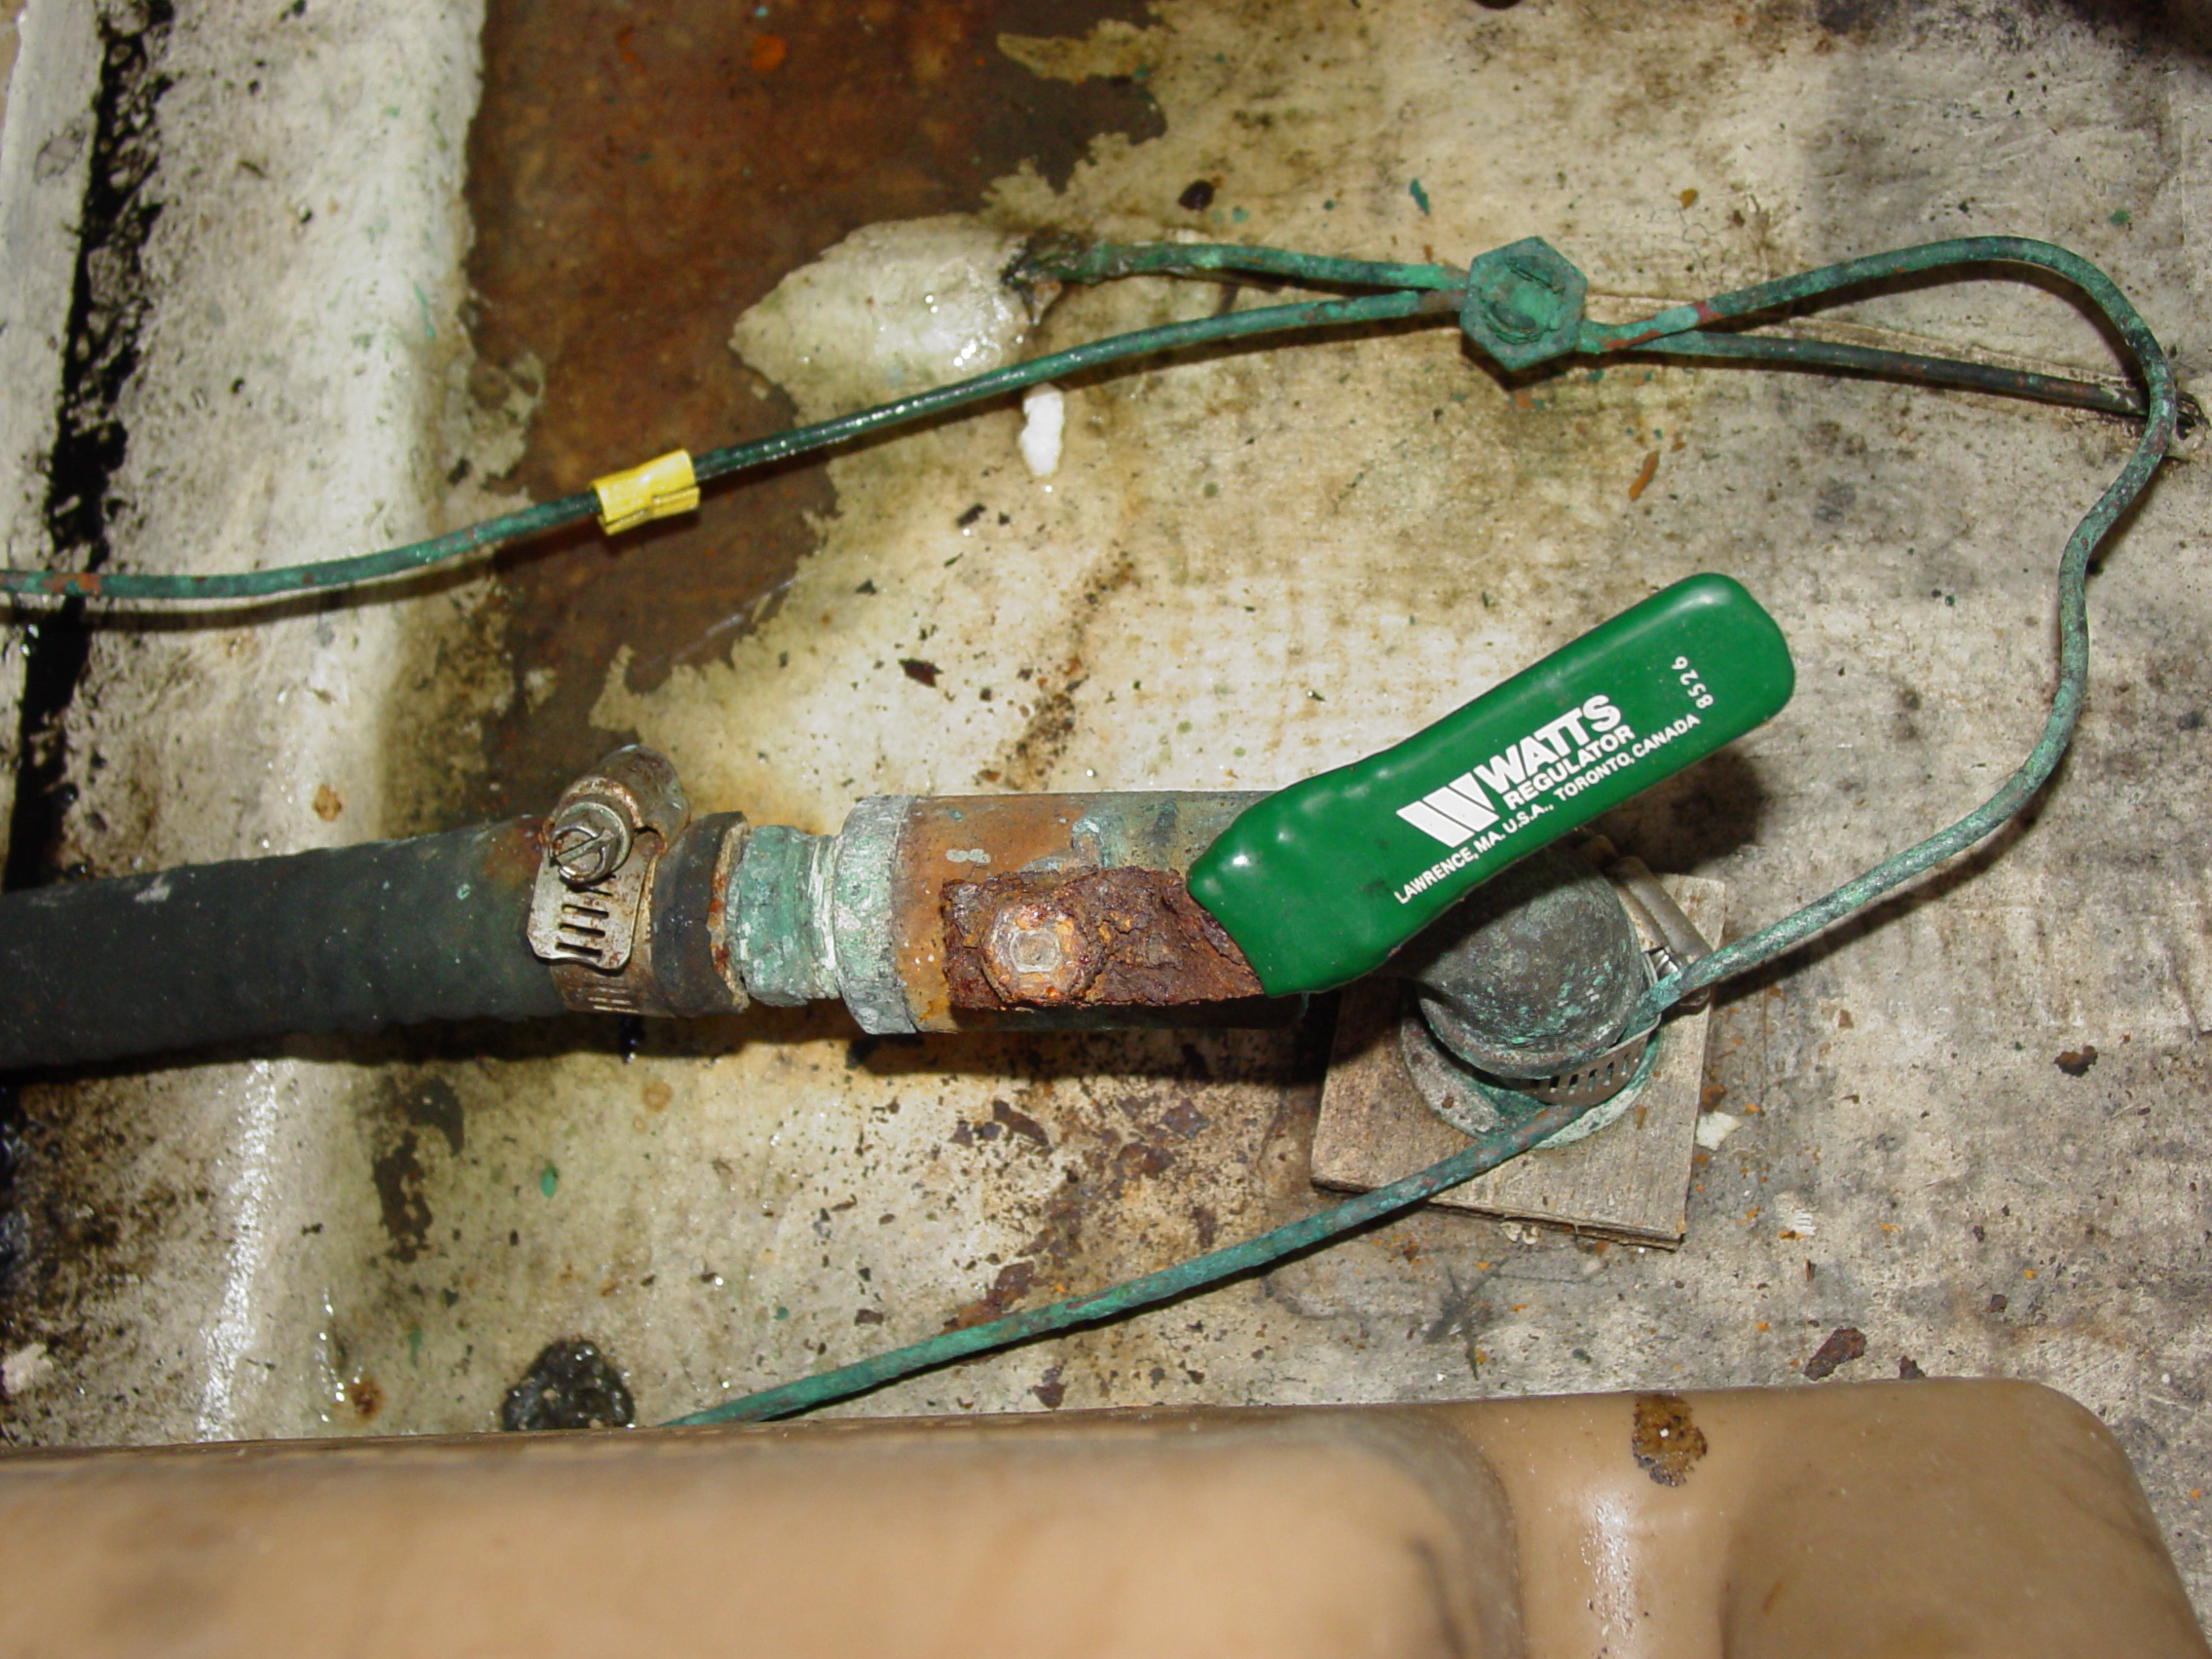
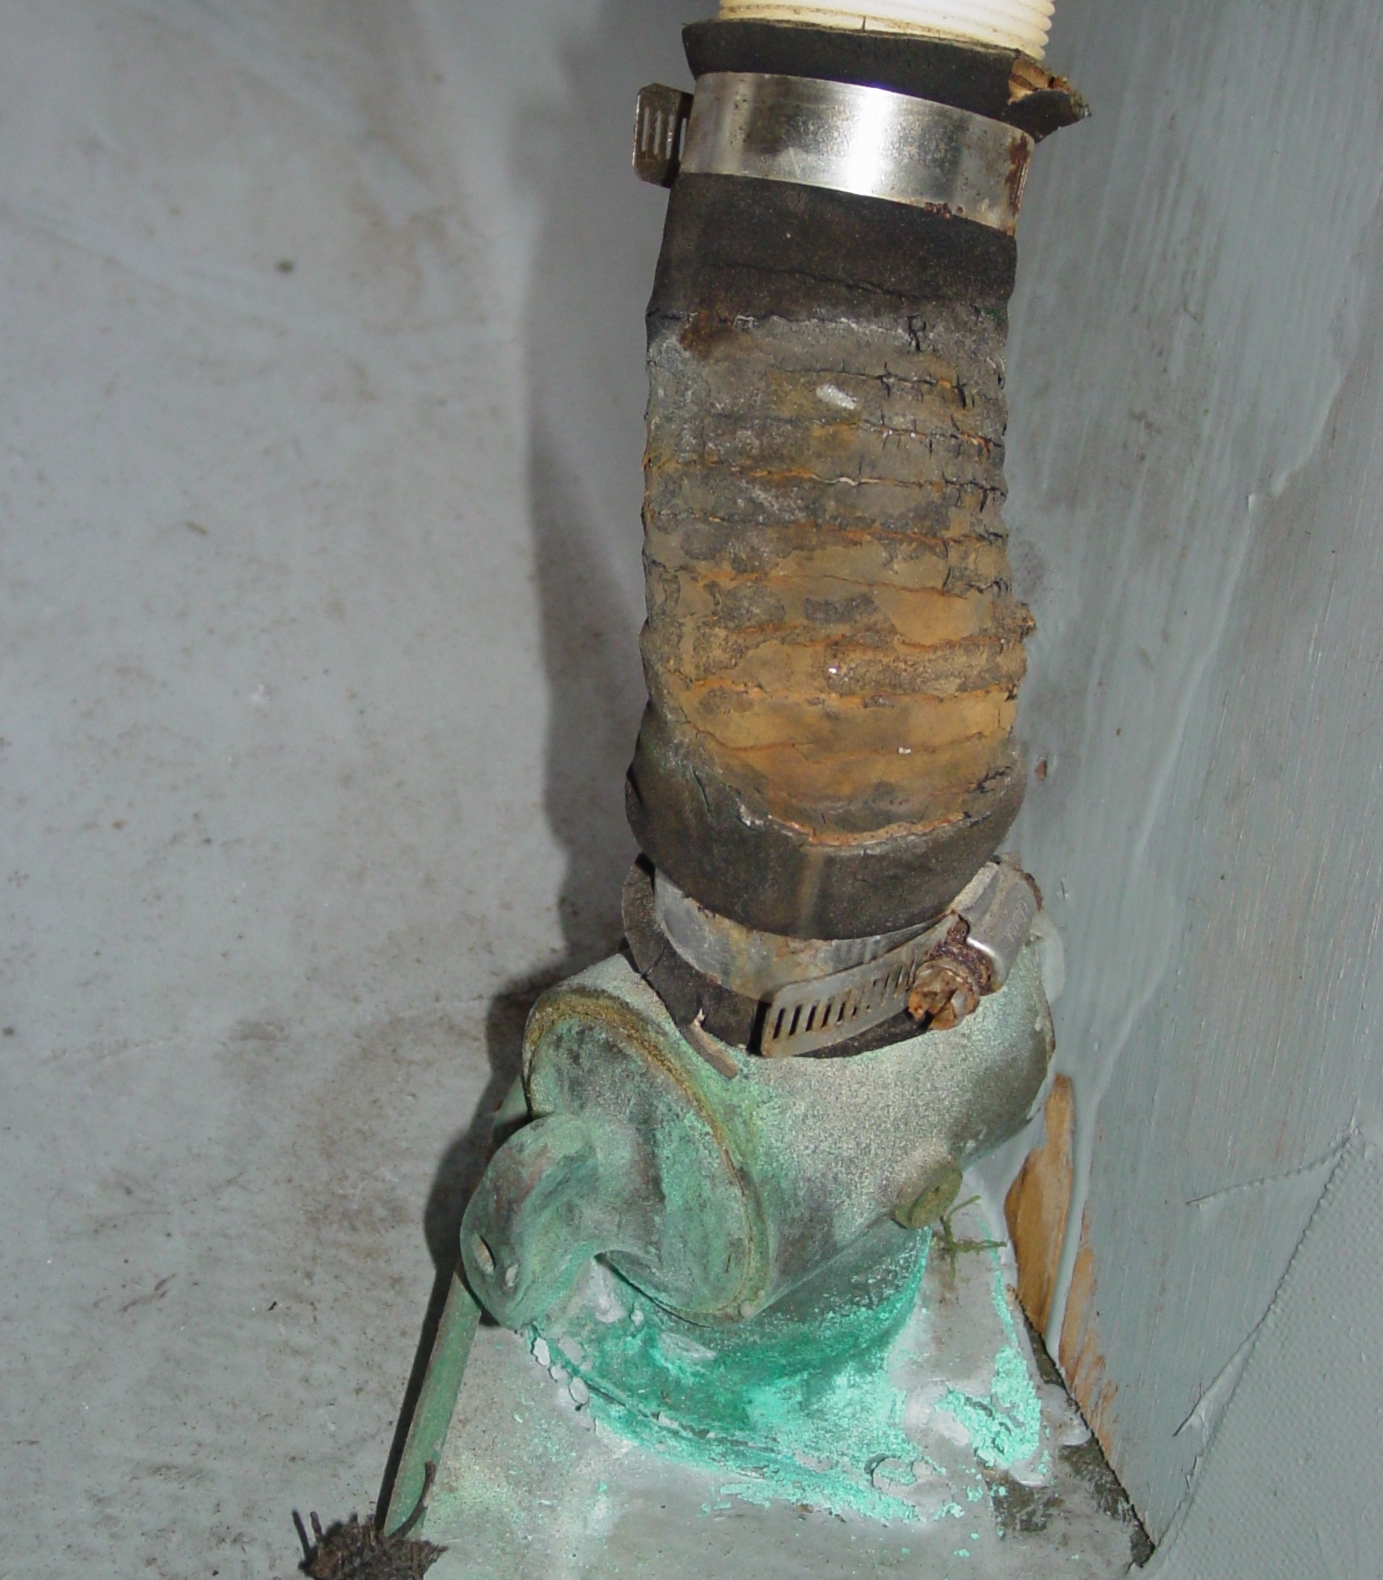
Seacocks should be inspected and exercised at least monthly, both to ensure proper operation and head off any potential problems. Start with a visual inspection, keeping an eye out for issues such as leaks, broken hose clamps, damaged or missing components (handles for example) and corrosion. If part of a bonding system, check to make sure all connections are tight and corrosion free for proper operation.
Verify the installation of backing blocks and that each is stable, leak-free, properly sized (surface area greater than that of the seacock flange) and in the case of wood, rot free.
Check the seacock for smoothness of operation, ensuring it not only opens and closes, but can be easily reached in an emergency and that the handle can be moved through its full range of operation without being blocked by equipment, cabinetry, etc. Seacocks found to be frozen or otherwise inoperative should be serviced immediately to return them to full operation.
Other installation faux pas to keep an eye out for include the use of plastic to metal joints (both materials have different expansion and contraction rates, which can result in plastic fitting cracks or splits) as well as installations that utilize a short piece of pipe or hose between the seacock and through-hull, which introduces a potential failure point inside the hull that is unprotected by the valve.
If you’re unsure a seacock is working properly remove the hose and look through the seacock to verify operation or to spot blockages. If the vessel is hauled, another option is shining a flashlight into the through-hull from the outside and observing its operation while someone inside opens and closes it.
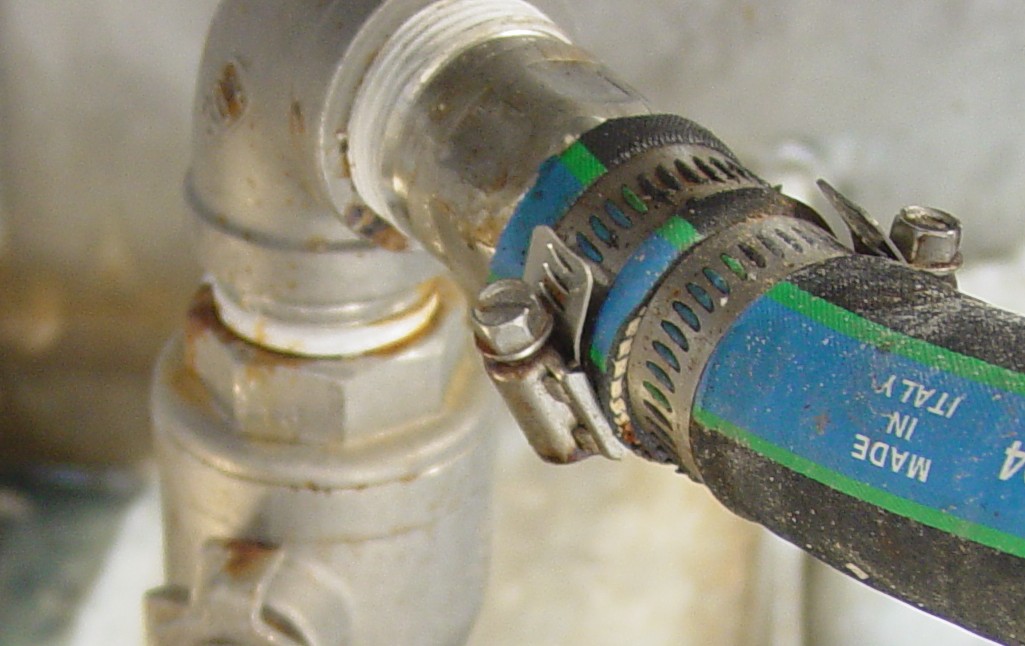
Next up, inspect all seacock hoses, making sure they are of the correct type (marine grade and approved for use on fittings below the waterline) free from damage, deterioration and that each end is double clamped with stainless steel clamps where there is sufficient hose barb to allow it. That last bit about sufficient hose barb is important — otherwise installation of a second clamp will crush or cut the hose. Finally, during an inspection keep in mind that all hose has a limited lifespan. Recommended replacement timeframes vary between manufacturers, however 10 years is commonly quoted, regardless of appearance.
Maintenance
While specific maintenance requirements will vary based on the type of seacocks (plug, ball, bronze, Marelon, etc.), general maintenance should include operating the seacock monthly and a good greasing at least twice a year (even for so called “maintenance-free” units). Seacocks without a grease fitting can be lubricated while your boat is in the water by following these steps:
- Close the valve.
- Pull the seacock hose.
- Remove remaining water from the valve/tailpipe.
- Swab a suitable waterproof grease onto the ball.
- Inspect the hose for damage, deterioration, corroded hose clamps, etc, then reattach.
- Exercise the valve four or five times to spread the lubricant.
Note: Steps 4-6 can be conducted from outside the hull when hauled to lubricate the opposite side of the ball and seal.
By Capt. Frank Lanier
Captain Frank Lanier is a SAMS® Accredited Marine Surveyor with more than 40 years of experience in the marine and diving industry. He’s also an author, public speaker and multiple award-winning journalist whose articles on seamanship, marine electronics, vessel maintenance and consumer reports appear regularly in numerous marine publications worldwide. He can be reached via his website at www.captfklanier.com