How to Patch an Inflatable Dinghy
A roll-up inflatable dinghy ranks as one of the greatest inventions of all time for boaters who like to cruise. I own one myself. It’s light, easy to assemble and quick to inflate, even while aboard my 22-foot center-console. It’s great for venturing to town or a secluded island beach while the main boat is moored.
A roll-up inflatable dinghy is also easy to deflate and stow out of the way when you’re ready to head back to the dock or when winter closes in, putting an end to the cruising season.
Unfortunately, as with all inflatables, punctures can happen. In my case, I brushed against some oyster-encrusted shore rocks. A stream of small bubbles confirmed the worst: A razor-sharp oyster shell had sliced a small hole in the forward chamber. Fortunately, it was a slow leak, allowing us to get back to the main boat without taking an involuntary swim. Once we got back home, I tackled the repair process.
My Highfield HSS-250M 8-foot-2-inch-long inflatable dinghy came with a patch kit that included sheets of matching material, but you can also buy patch material from chandleries and online marine retailers. I also bought a fresh tube of Polymarine PVC Inflatable Boat Adhesive and followed the directions on the box to fix the puncture.
The steps and materials described in this article apply to a PVC inflatable. Different materials and procedures will apply to the various brands of inflatable boats made of Hypalon.
Skill Level: 1 out of 5
Finish Time: Approx. 1 hour
Tools And Supplies
- PVC patch material ($9.99 for six pieces; amazon.com)
- Polymarine PVC Inflatable Boat Adhesive ($40.99 for 7 ml tube; westmarine.com)
- Acetone or MEK
- Disposable brushes or a plastic spatula
- Scissors
- Sharpie marker
- Masking tape
- Disposable rubber gloves
- Hard roller ($16.64; grainger.com)
- Wood board and brick (or other heavy object)
- Spray bottle (for soapy water to check for air leaks)
Clean And Mark
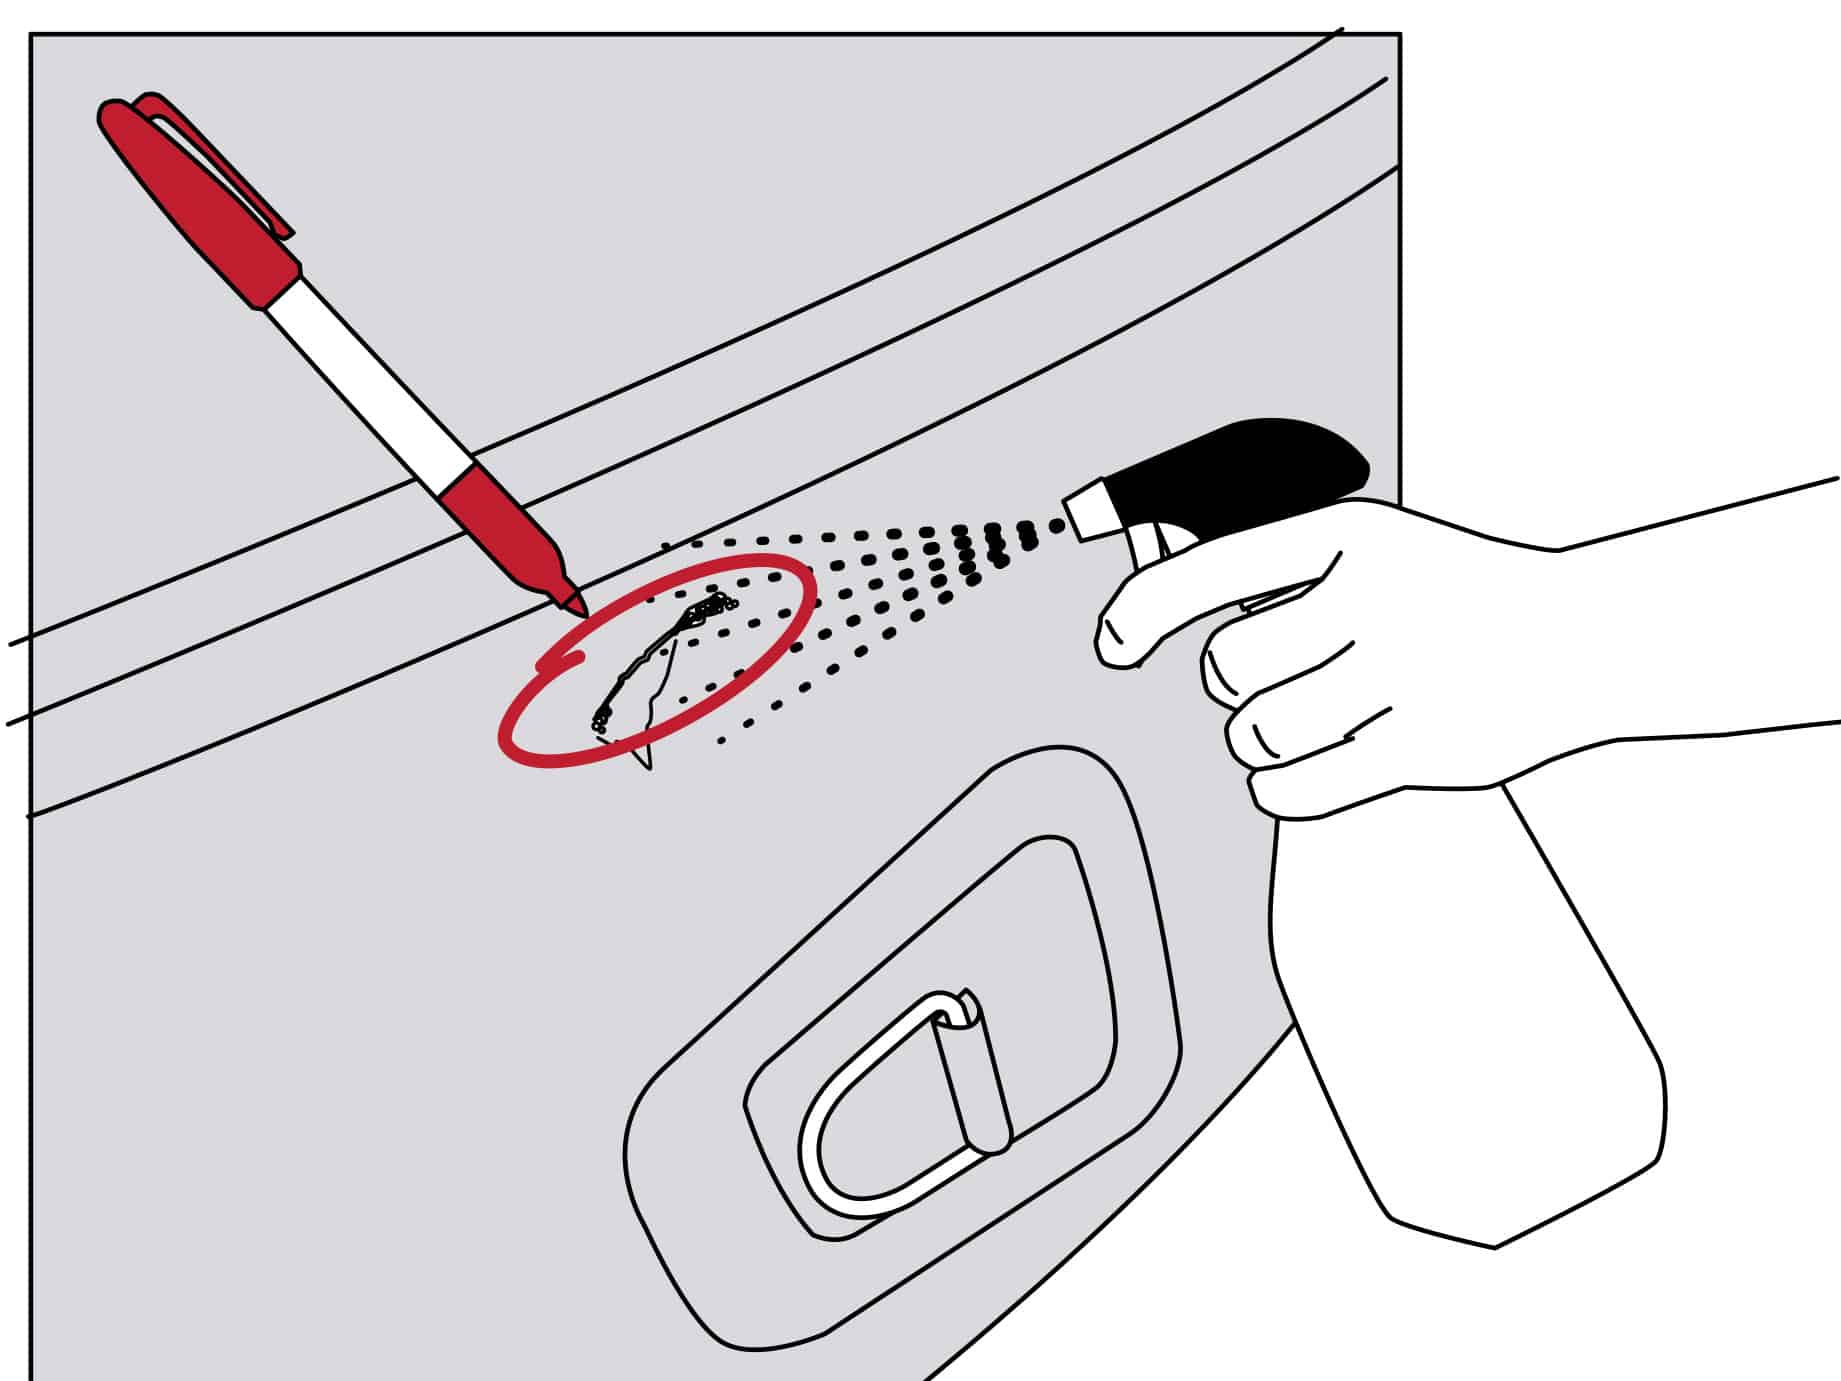
It is important for the area around the patch to be completely clean and free of contaminants, such as salt, scum, oil or grease. Scrub away any salt or grime from the area around the puncture with soap and water. Towel it off and let the area thoroughly dry. Then clean the area with a PVC solvent, such as acetone or MEK (methyl ethyl ketone), and let it dry.
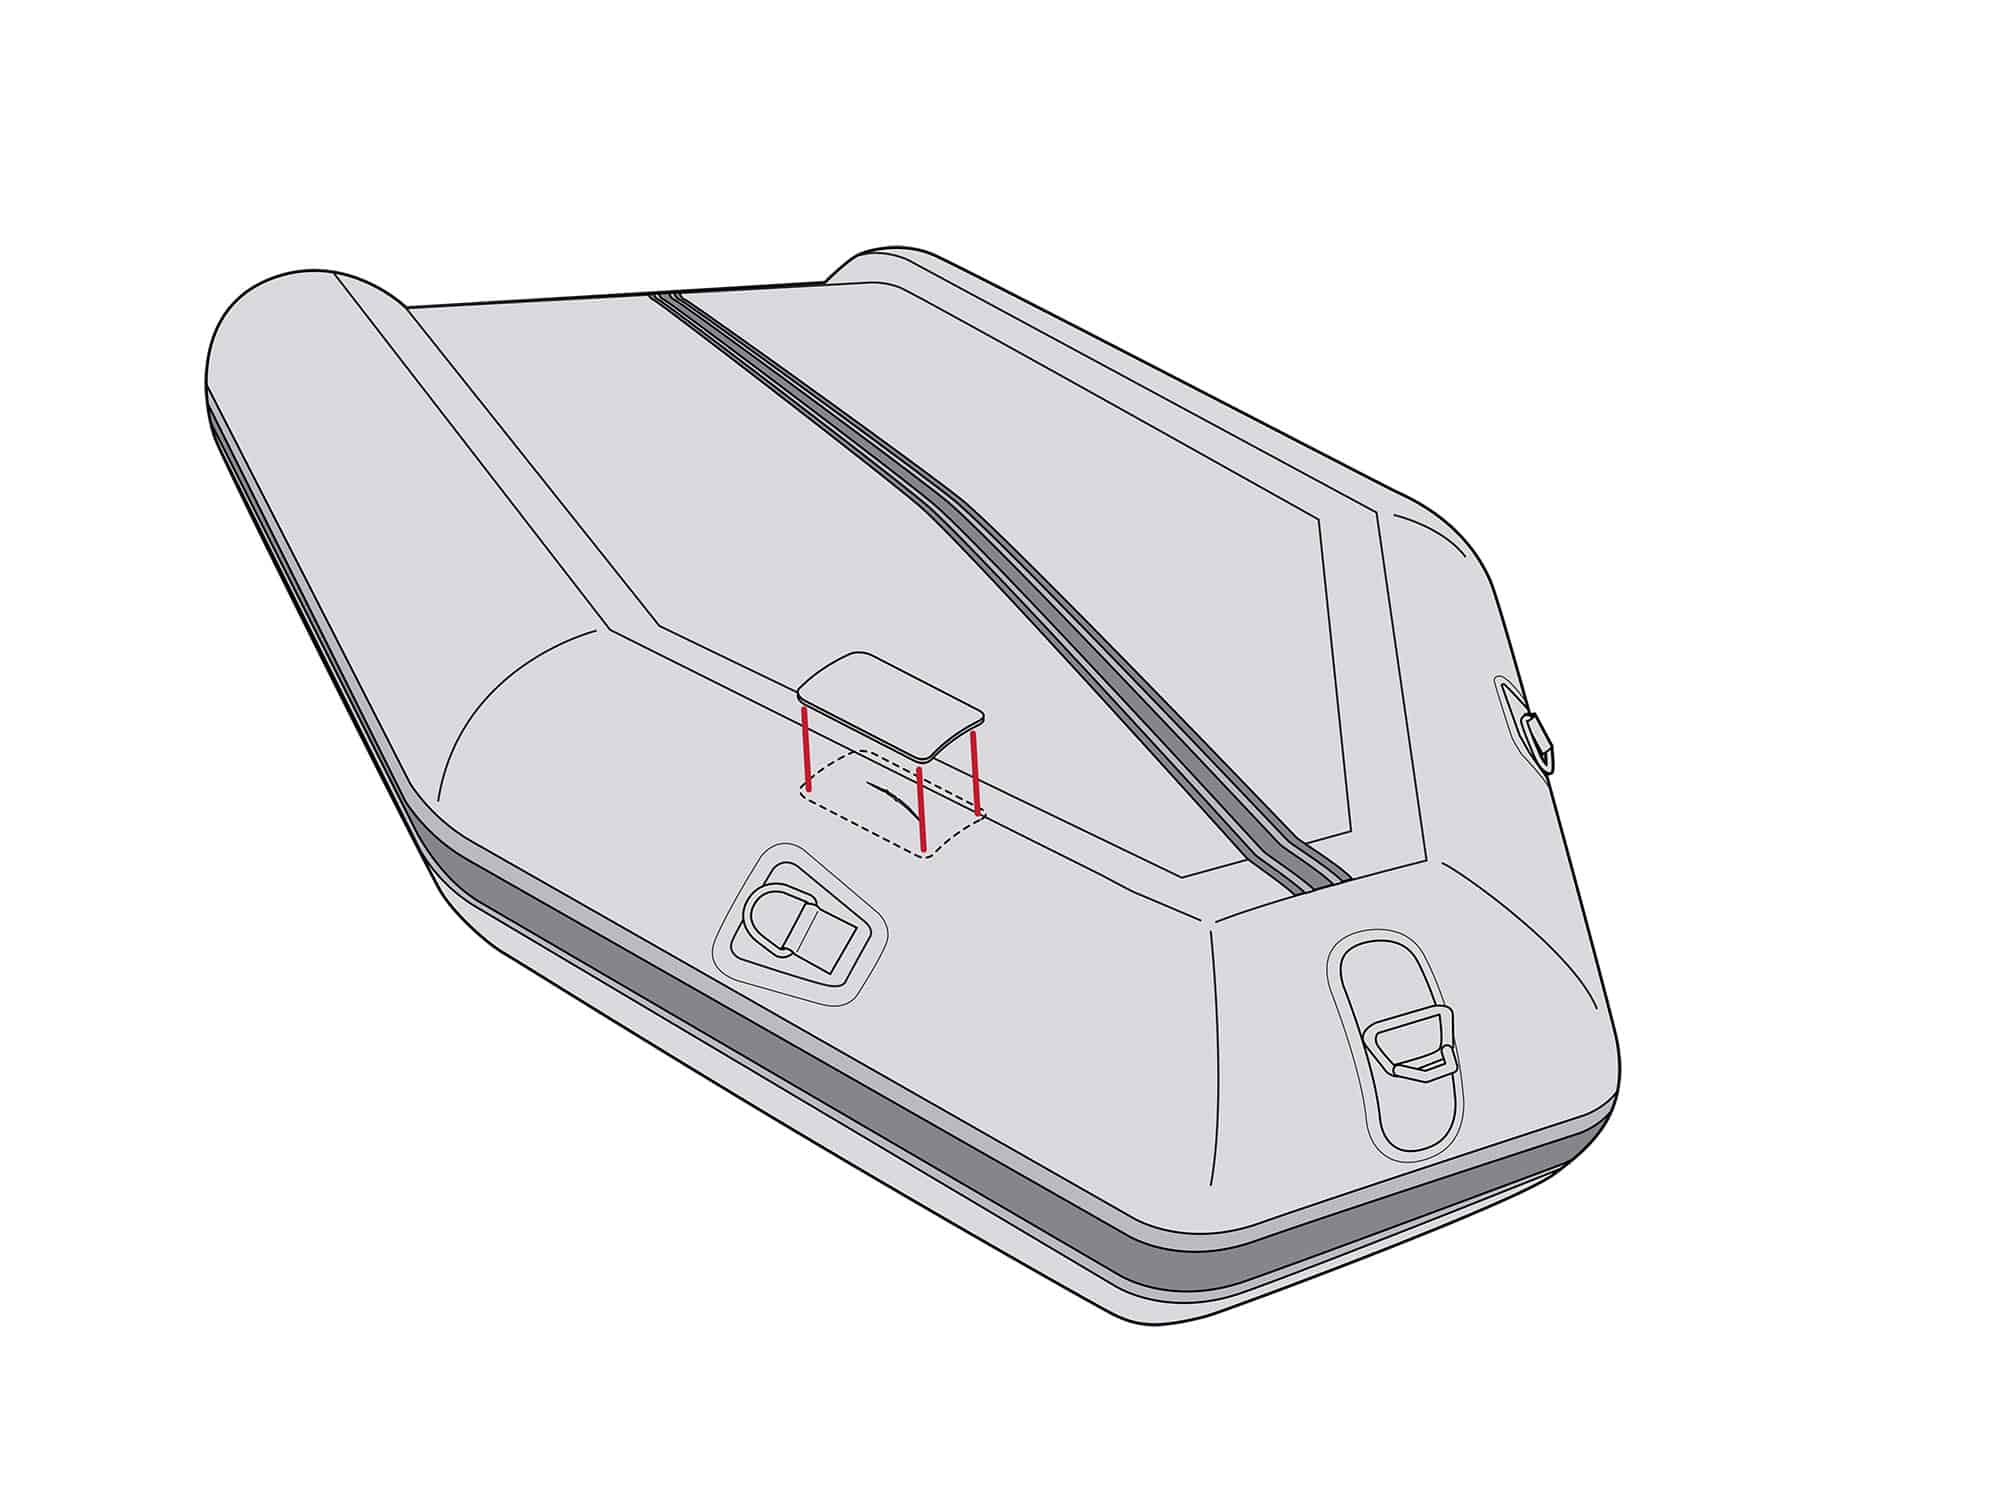
Use a Sharpie pen to mark the area of the puncture. If you have not already done so, deflate the dinghy before moving to the next step.
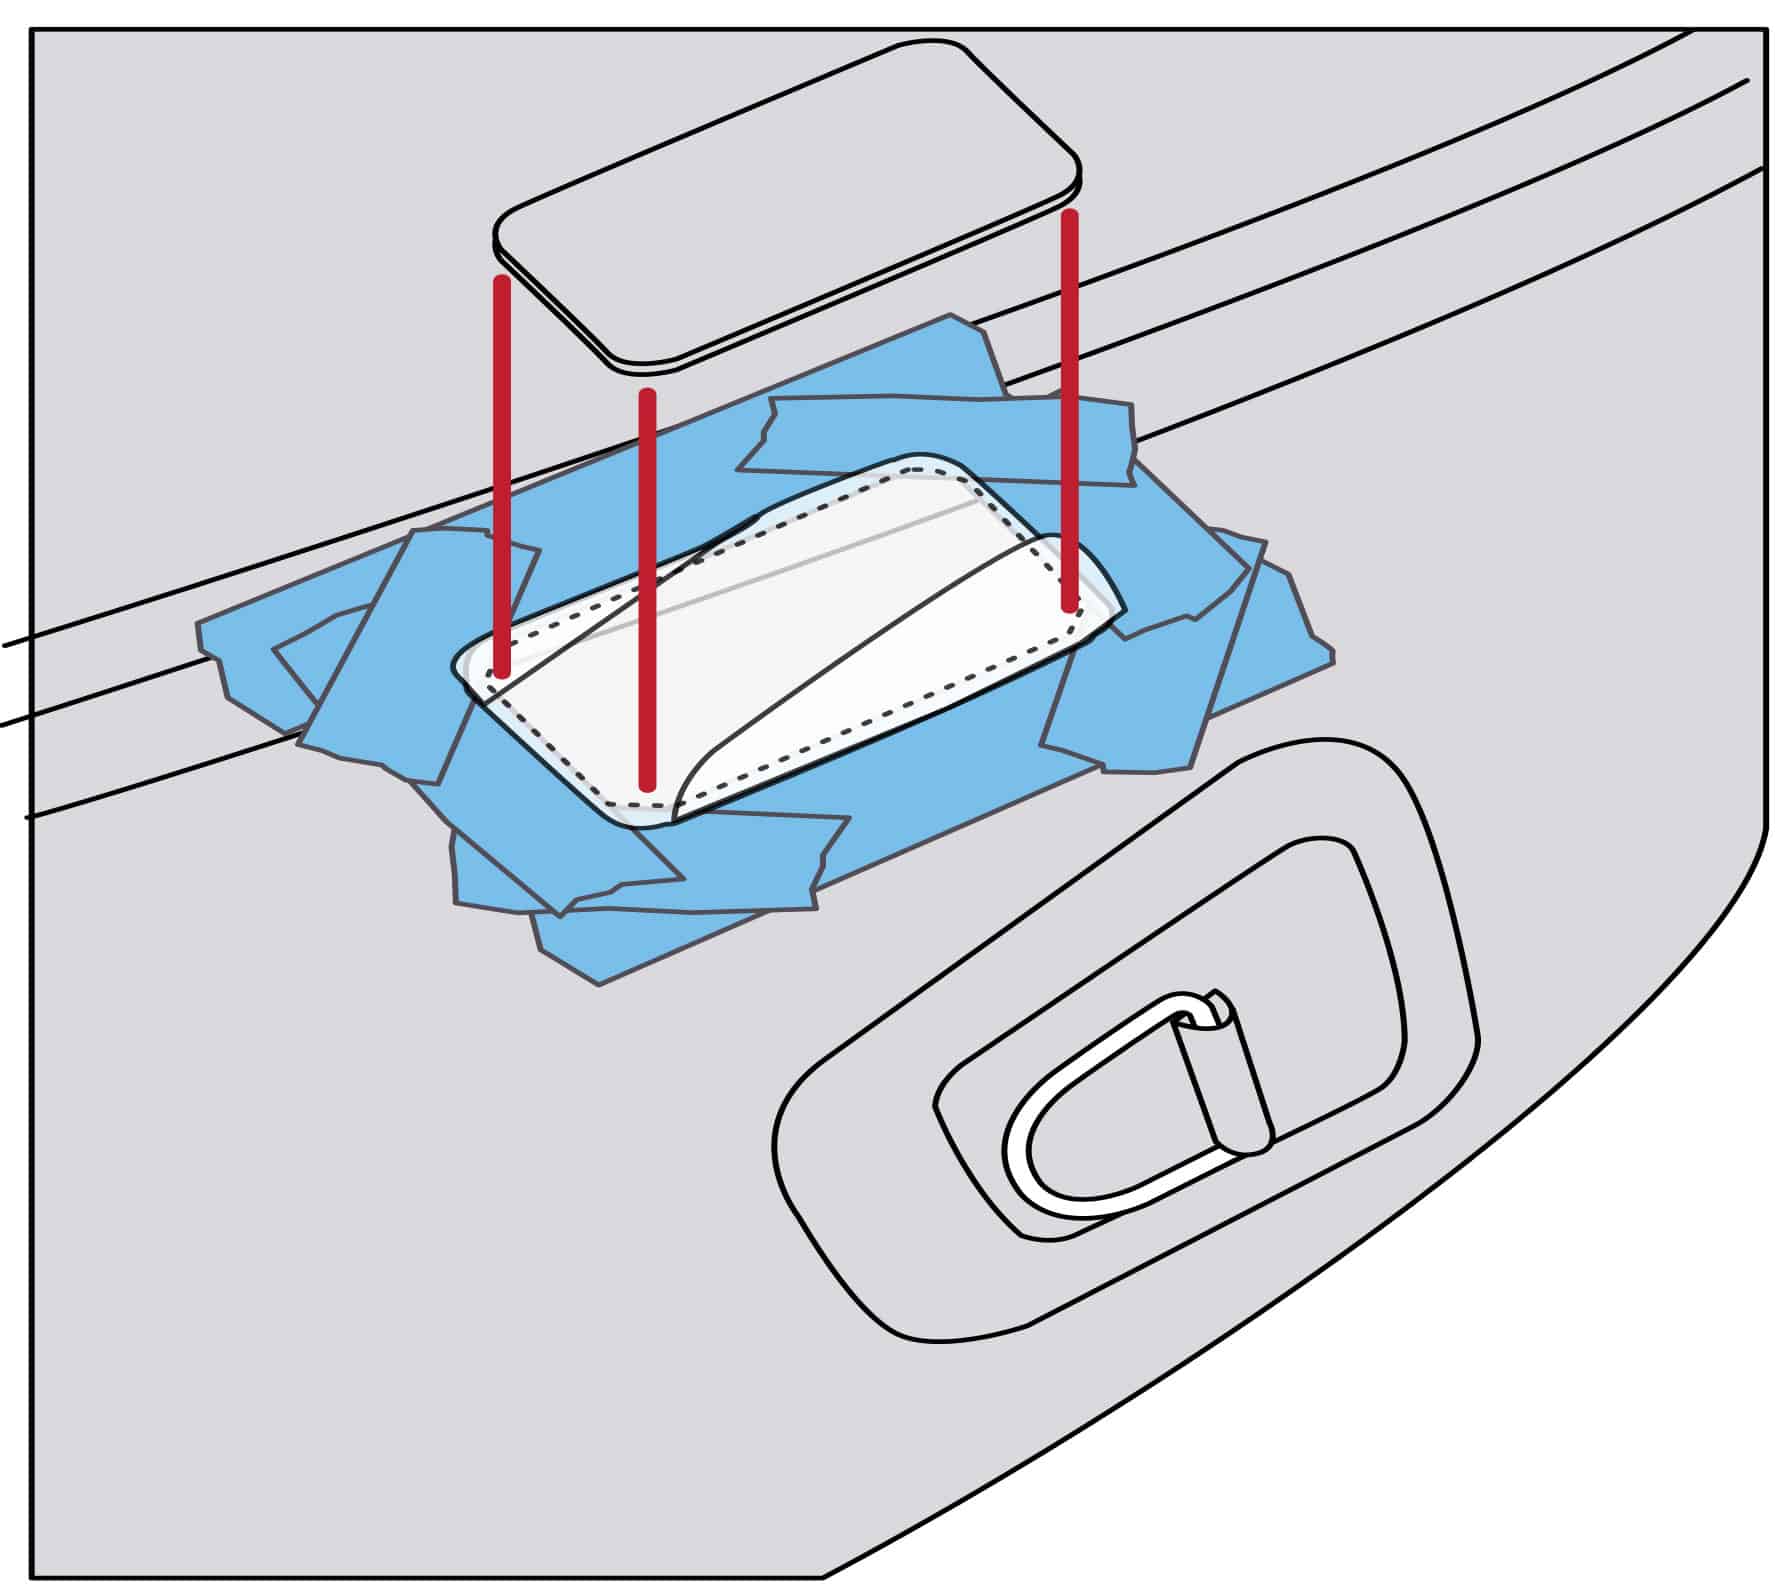
Cut The Patch
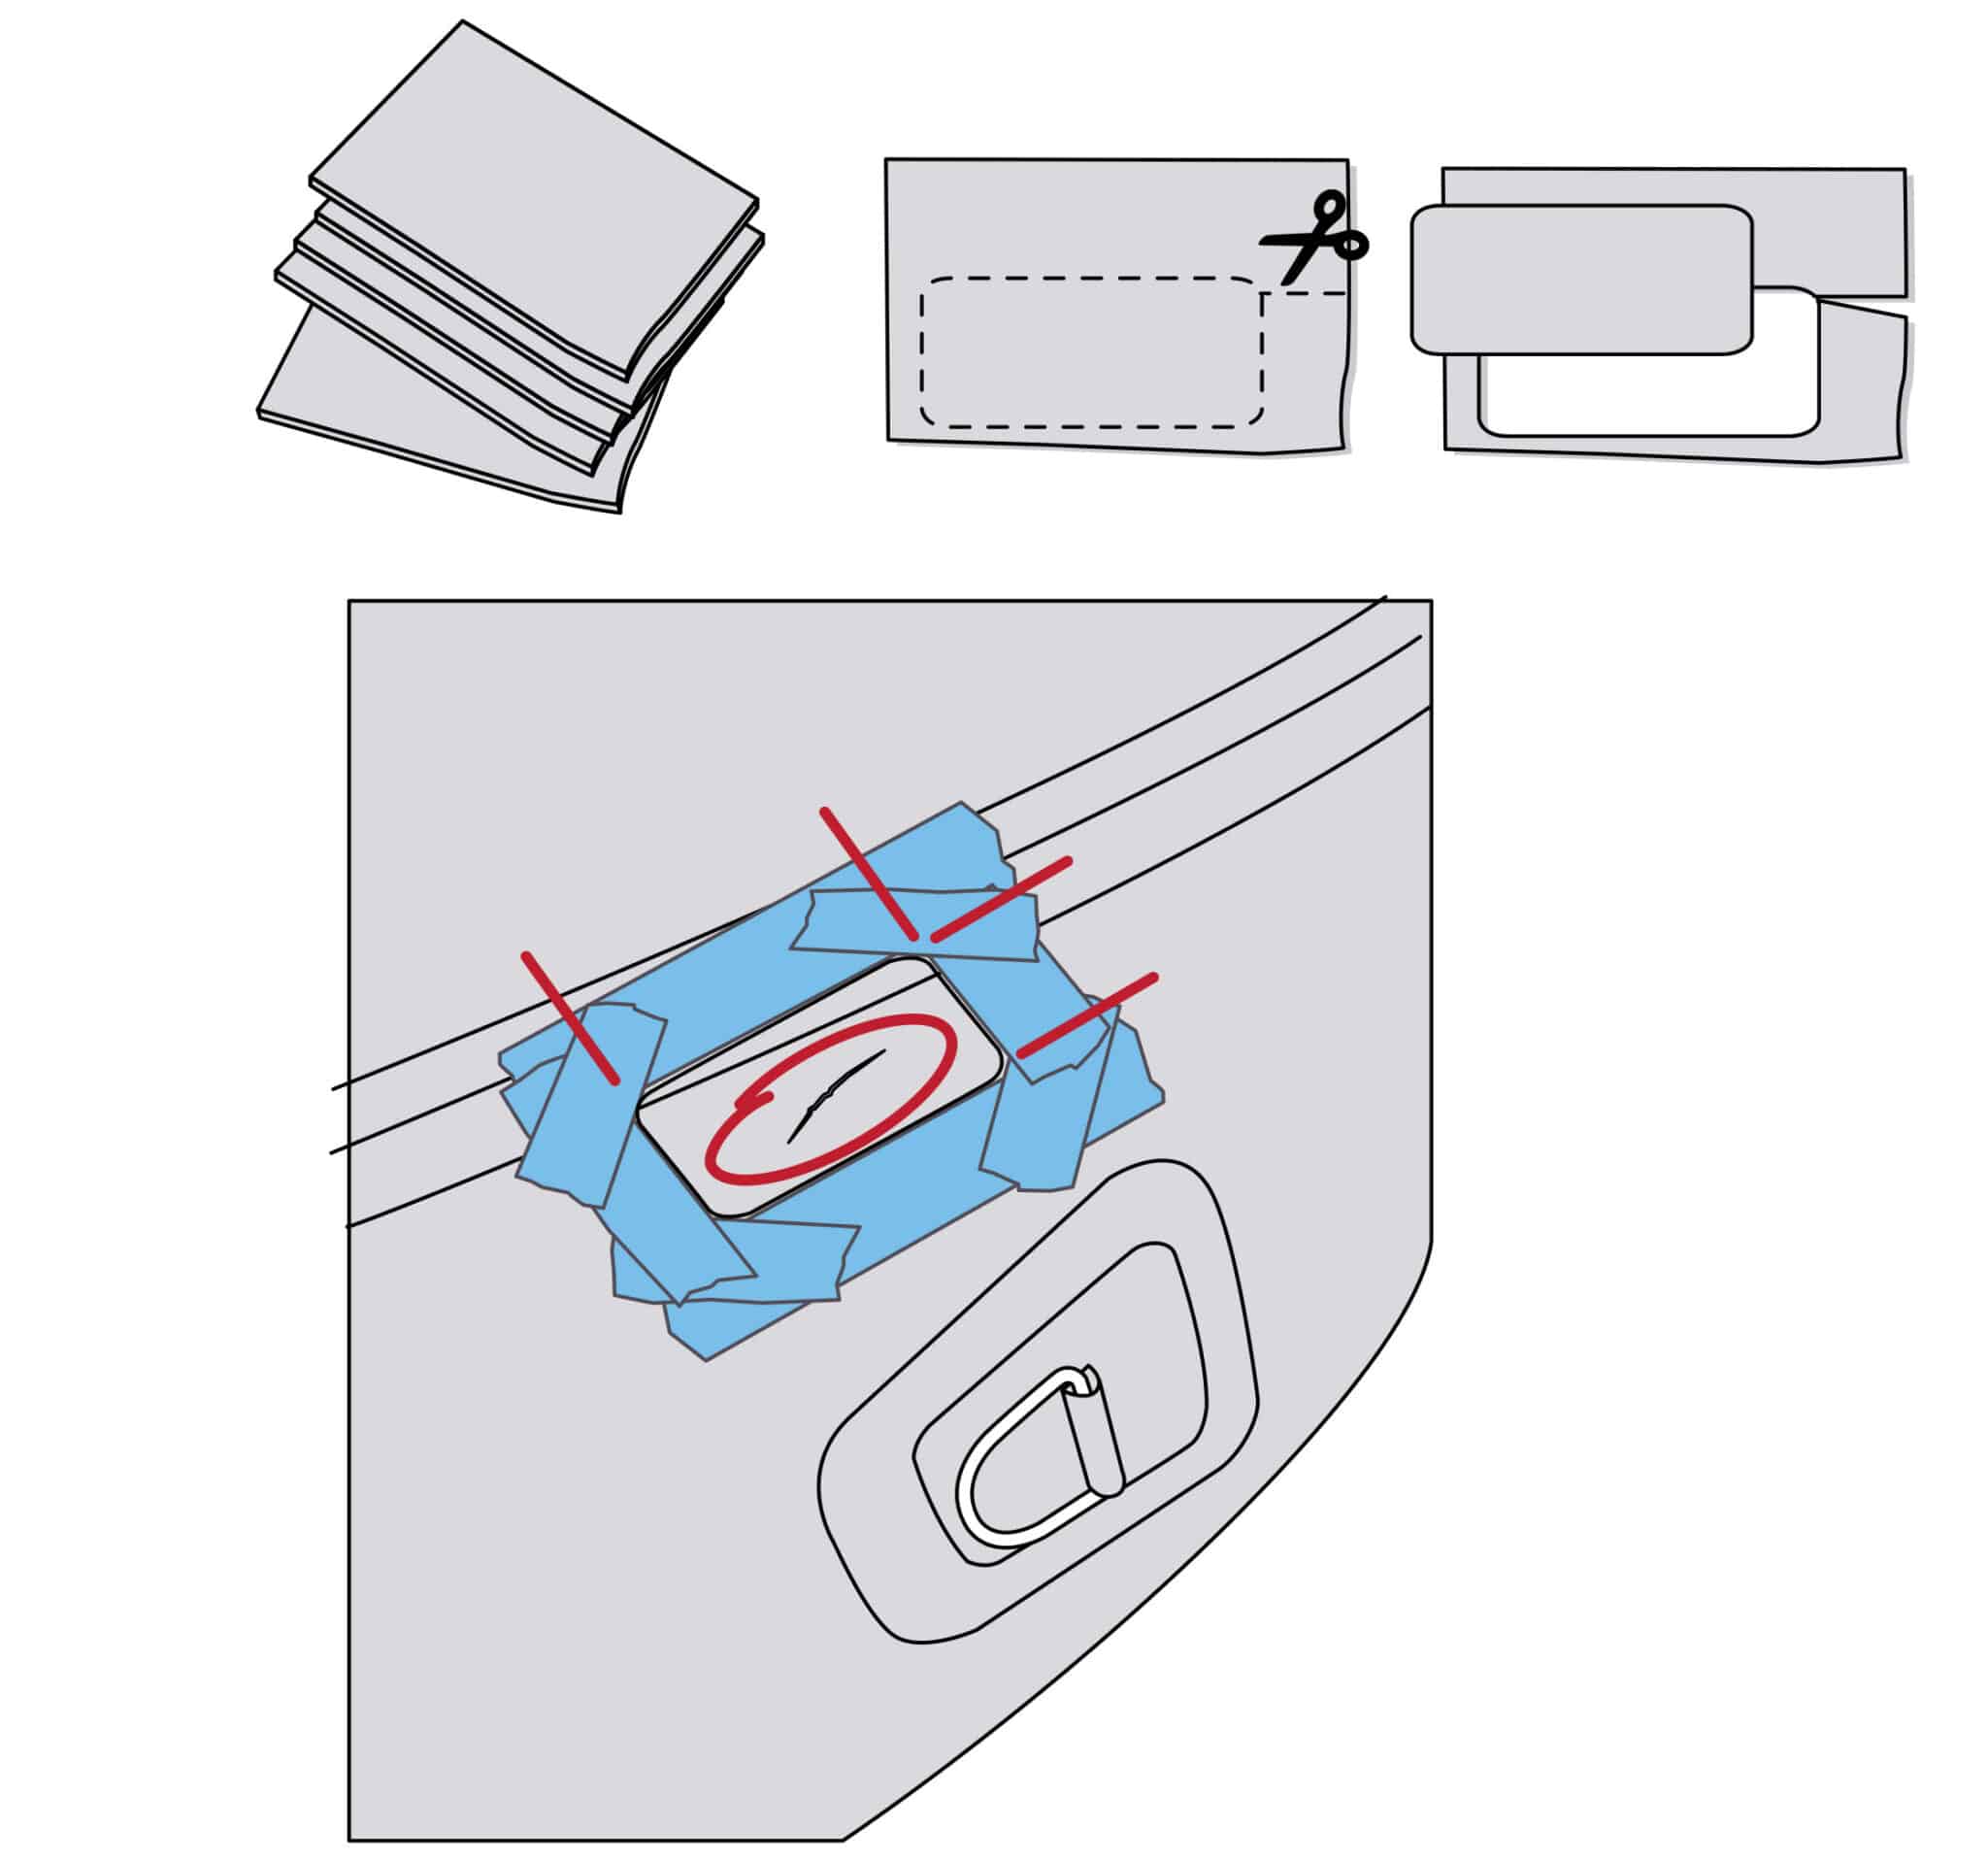
Use the correct material. Hypalon material will not work with a PVC inflatable and vice versa. When cutting, make sure that the material extends at least 1 to 3 inches all around the hole to help ensure a secure, leak-free and long-lasting repair.
Use a pair of sharp scissors to cut the PVC material to size, and be sure to round off the corner cuts if the patch is rectangular in shape. Apply masking tape around the outline of the patch on the dinghy repair area to keep excess adhesive from marring the edges of the patch.
First Coat Of Adhesive
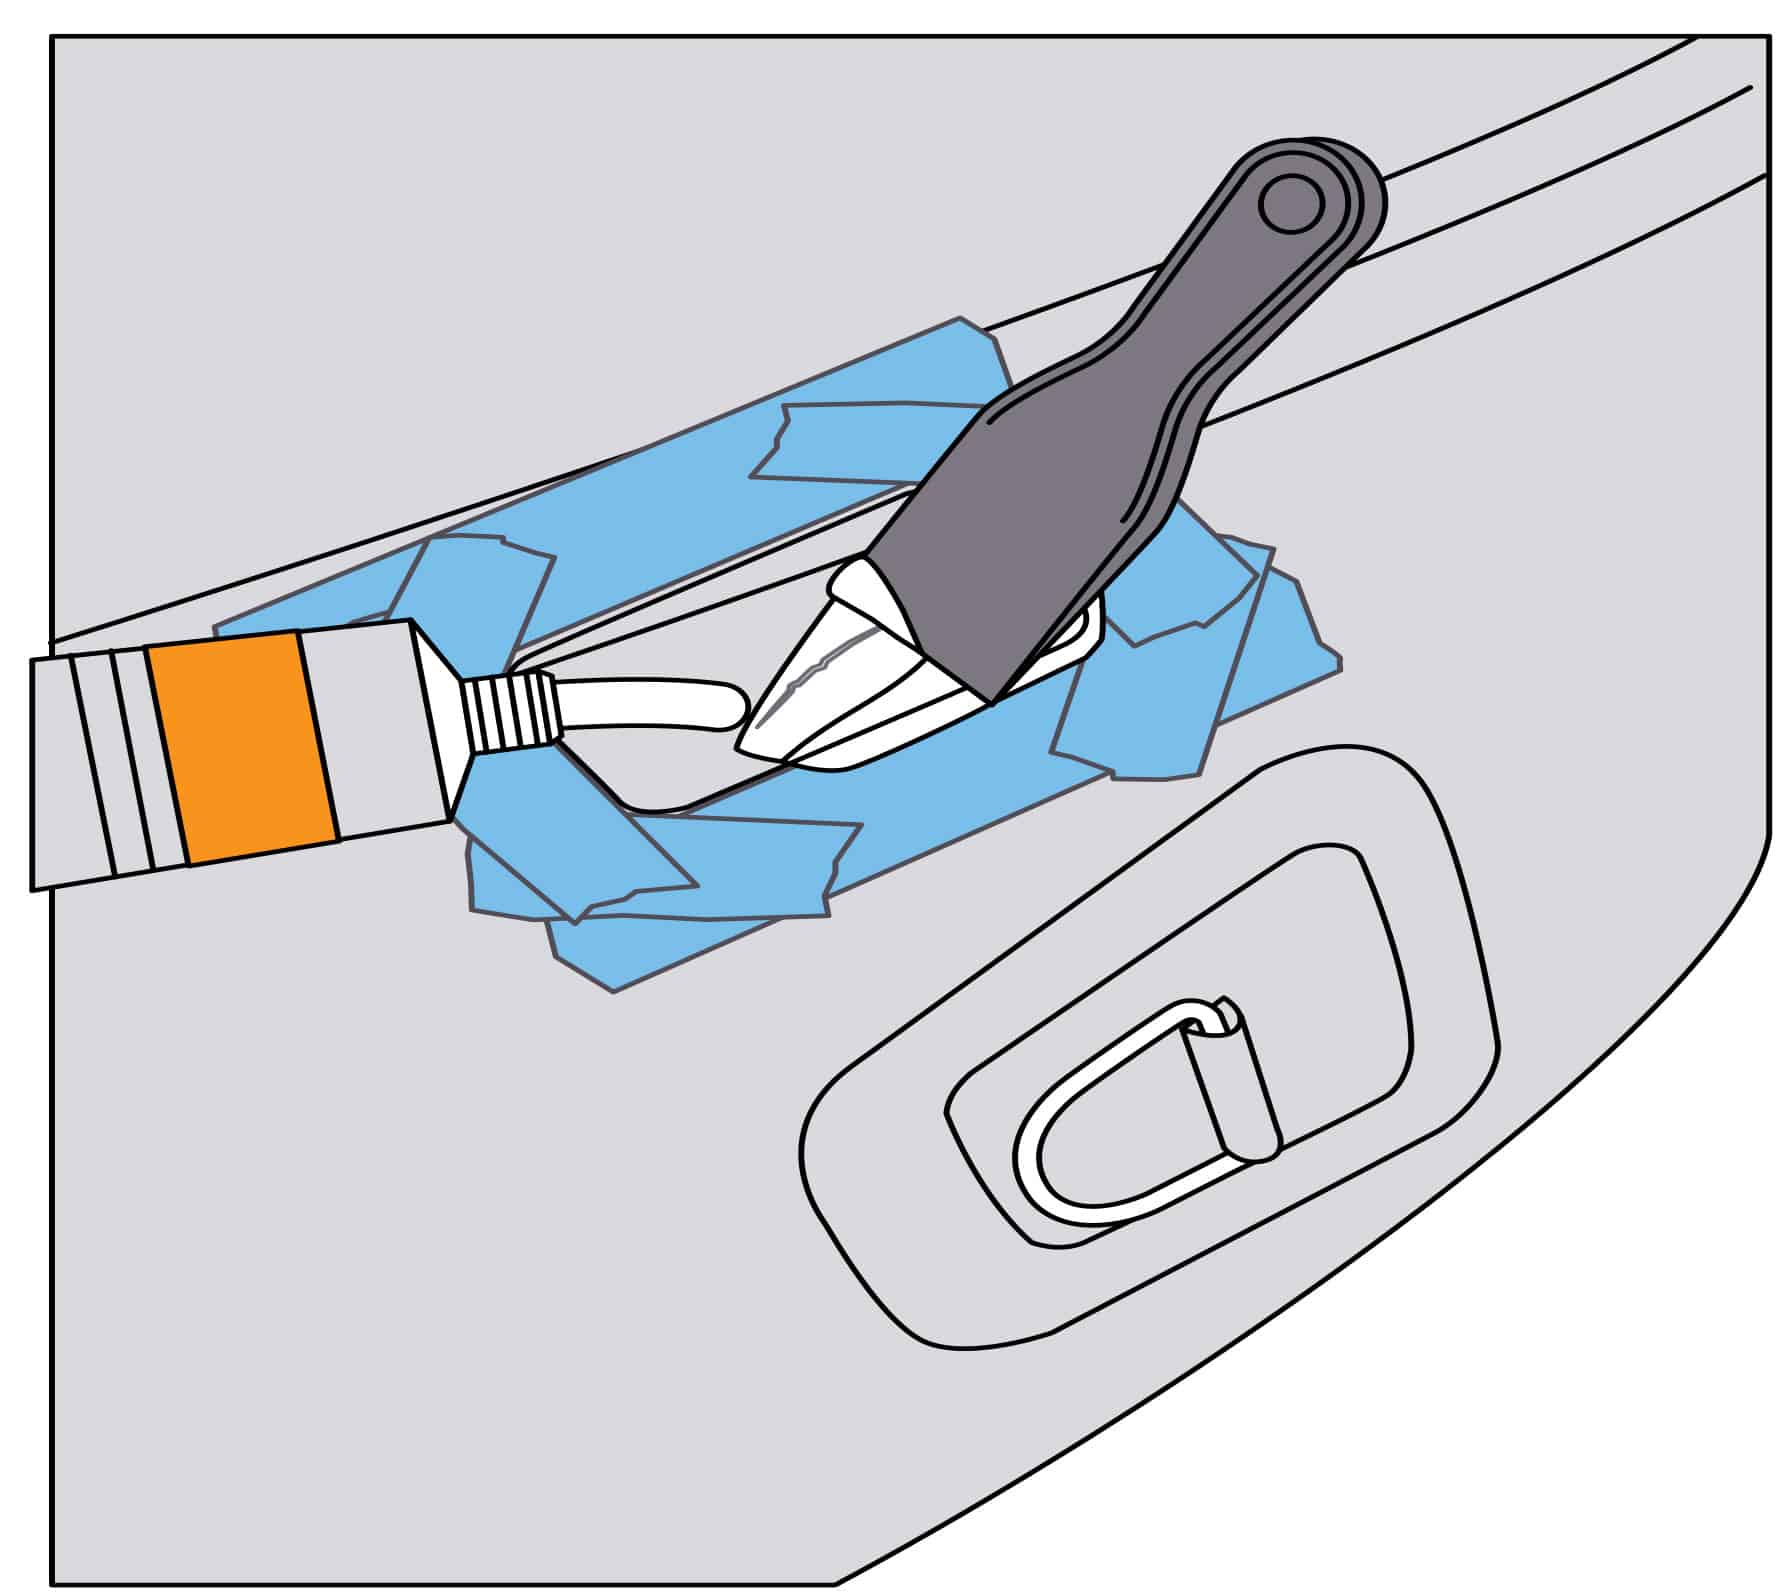
I used one part Polymarine PVC Inflatable Boat Adhesive and followed the directions on the box. The instructions call for applying an initial thin coat of adhesive over the patch area and backside of the patch material (the smooth side, not the textured side) with a disposable brush or a small spatula.
This initial layer of adhesive serves as a primer coat and eliminates the need to scuff the surfaces with sandpaper. Make sure the adhesive evenly coats the entirety of both patching surfaces. Let it dry for 20 minutes.
Second Coat, Apply Patch
Once the first application of the Polymarine PVC Inflatable Boat Adhesive has dried for 20 minutes, apply a second thin and uniform coat of the glue to both patching surfaces with a disposable brush or a small spatula. As with the first coat, make sure you don’t miss any areas.
The adhesive tends to dry quickly, so move swiftly while it is still tacky to apply the patch to the area you outlined with masking tape. Press it firmly into place, ensuring that it does not overlap the masking tape.
Roll And Apply Pressure
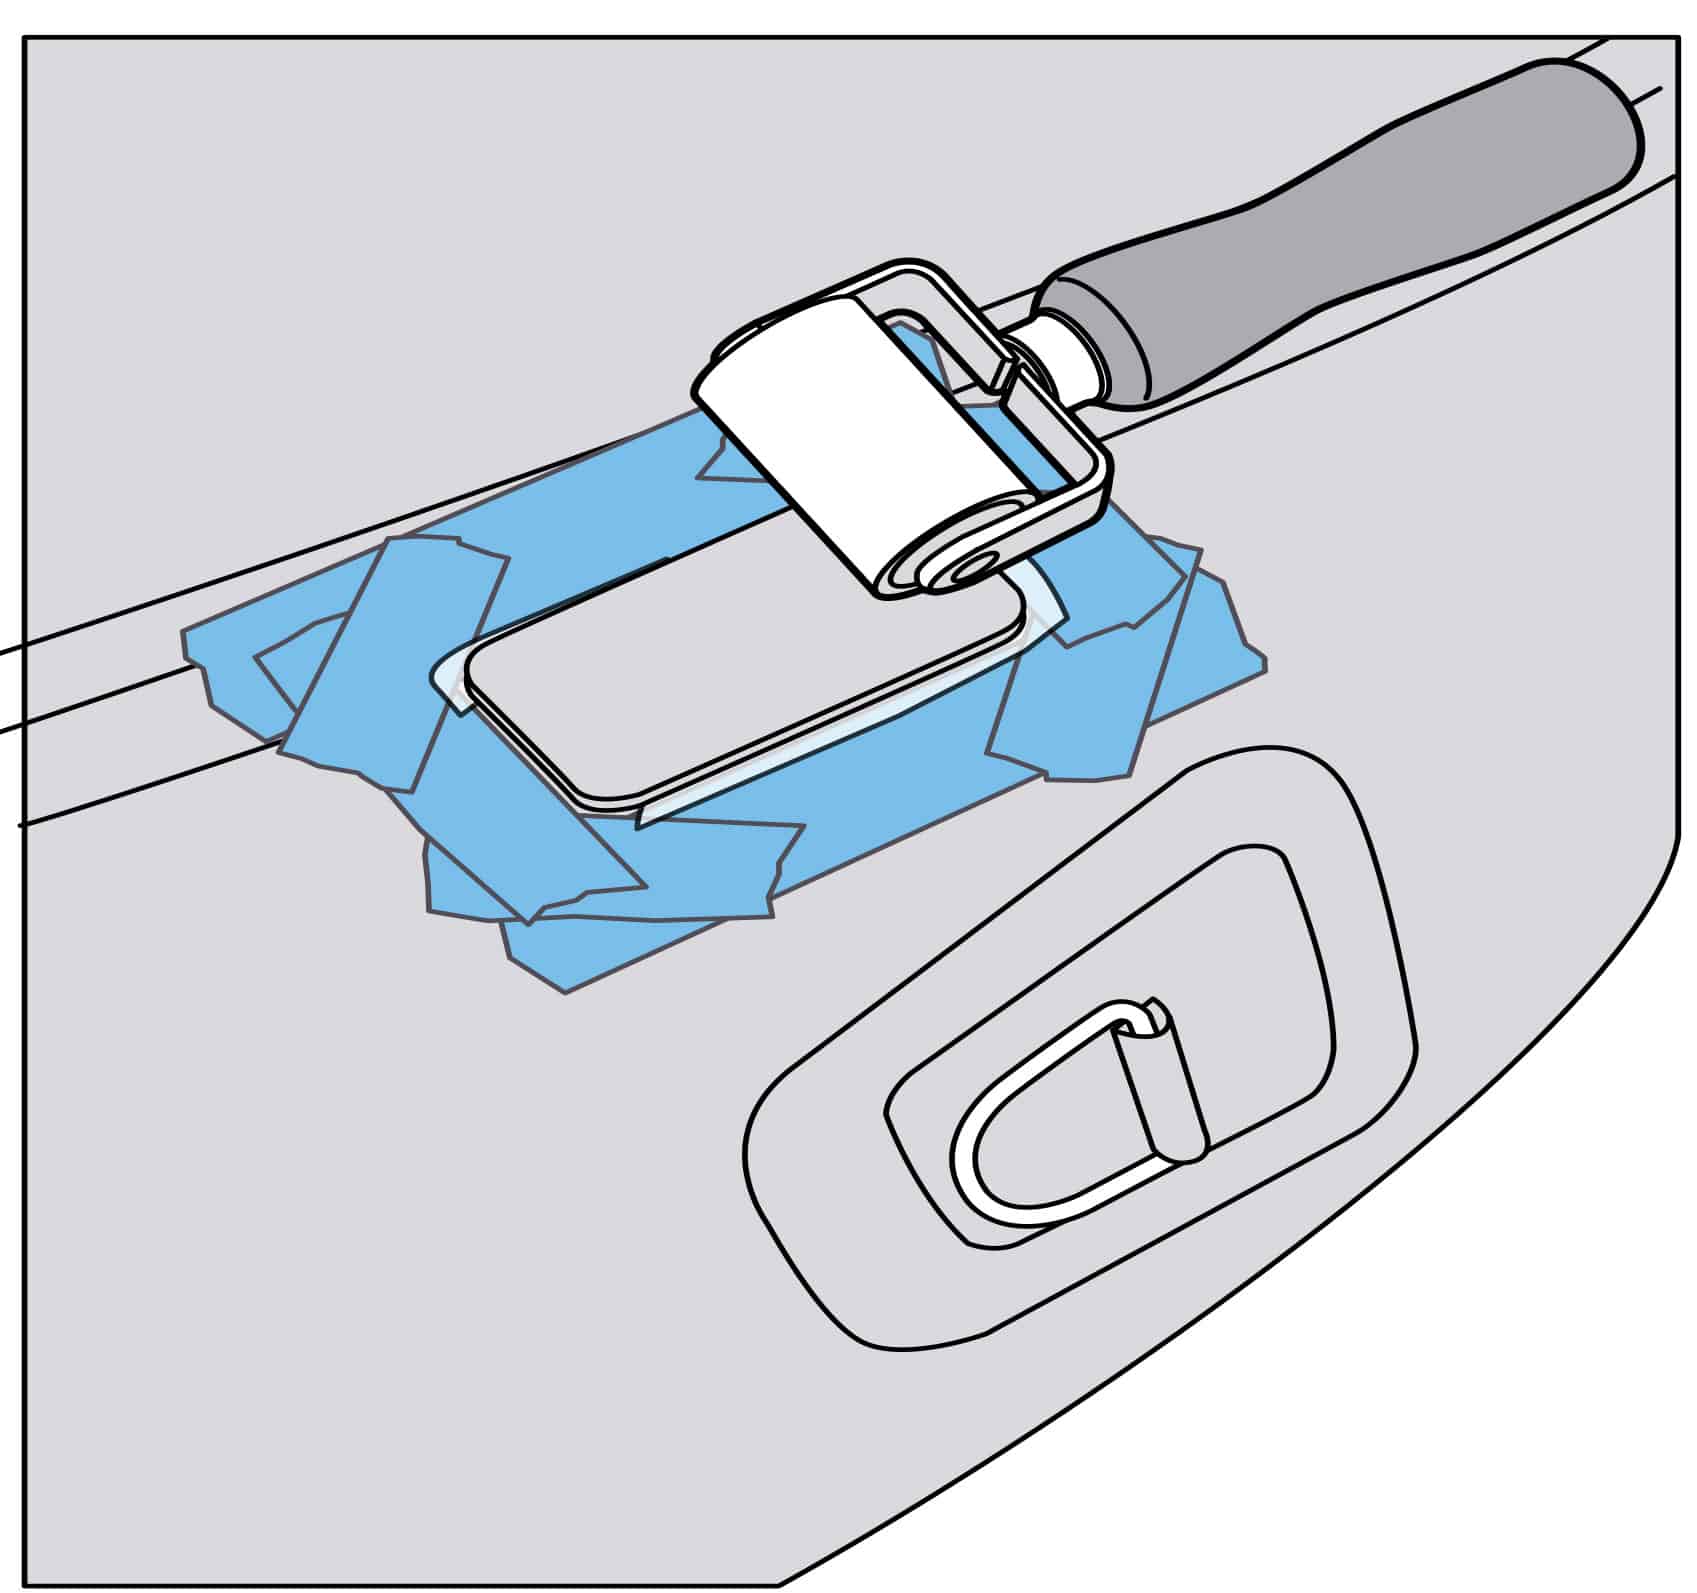
Immediately after applying the patch, use a hard roller to press out any air pockets that might have formed under the material. Work the roller from the inside to the edges to force out any air, then roll along the perimeter to ensure good adhesion of the edges.
Remove the masking tape, place a wooden board over the patch, and add pressure with a brick or other heavy object. Allow the patched area to cure for 24 hours, then remove the board, reinflate the chamber and check for air leaks.