Installing a Cockpit TV
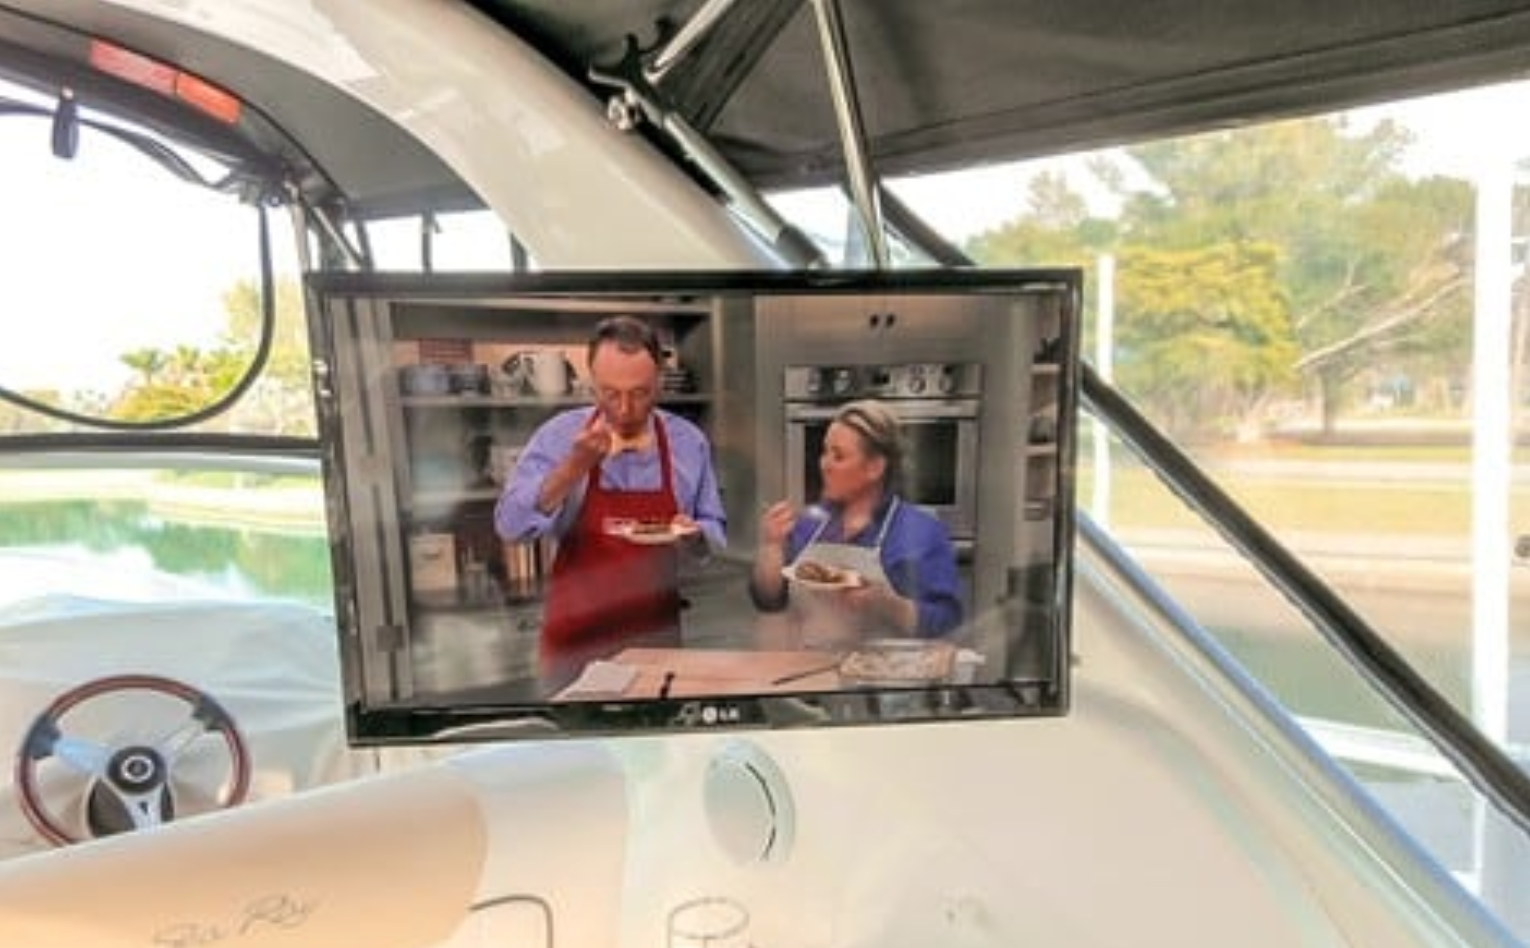
It’s a beautiful Sunday afternoon in the anchorage and the big game is going to kick off in a few minutes. With this simple how-to guide, watch it on your new TV in the comfort of your cockpit instead of down in your dimly lit cabin.
1. Select a good mounting place. Although every boat’s cockpit is different, take a seat where you’re most comfortable and look around for a place with good visibility. Typical options are on a cabinet, wet bar, or on an arch or bulkhead. In this scenario we’re using an arch. Measure the selected mounting area and determine the maximum width and height for a TV, keeping in mind that the mount site will be the center of the television—most of today’s TVs are wider than they are high. Size does matter but be pragmatic about this. It may help to make a cardboard template of a TV to visualize the actual size.
2. Buy the TV. Once you have the maximum allowable dimensions, head to your favorite electronics store with a tape measure. First, find TVs that will fit, and then pick the brand and features you want. Your best option is a LED television since they are lightweight, thin and bright. If you plan to use an antenna or dockside cable, ensure the TV has a coax (Antenna In) connector. You may also want a built-in DVD player.
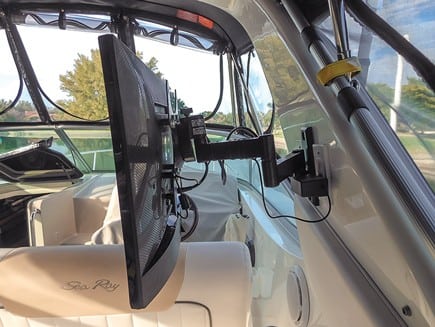
3. Buy a mount. Surfaces on a boat are rarely ever square or straight. In reality, most surfaces are curved and sometimes in a complex way—an arch might lean in and have a twist as it curves upward. The solution to arch and bulkhead mounting is to use a full-motion mount such as the Sanus VFS415 (shown). This is important since TVs that are fully retracted against the arch often look straight but when repositioned can appear twisted, and watching a TV when the top edge is running downhill is disconcerting. A full-motion mount solves all of these problems since it can be adjusted to all angles and any position that pleases the eye.
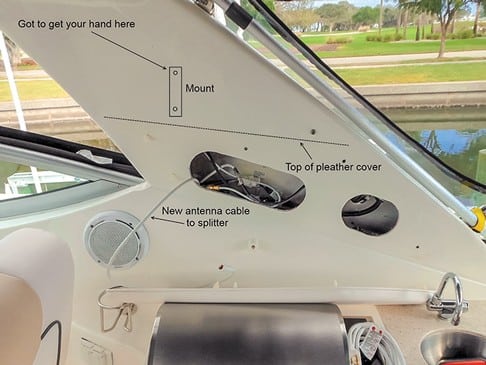
4. Prepare to install. Most mounts attach with two bolts that are included in the package. Throw them out and replace with non-rusting stainless steel bolts. This now begs the point that you need to put nuts on them and you need access, which is gained by two methods. The best option is to place the mount in a location near an access point for wiring already installed, such as a speaker cutout. The second best option is to cut a hole and install a small inspection plate to provide access. It is possible to use lag bolts, but the larger the TV the more problematic this becomes since your TV can bounce around when under way (see step 6). In either case be mindful of wiring inside when doing any cutting and drilling.
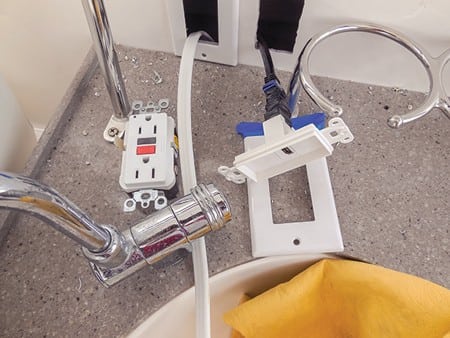
5. Access power and signal source. Power for most TVs will be 110VAC. In this installation power came from a spare AC breaker. Triplex AC wiring was pulled from the AC panel to the TVs location and a GFCI outlet was installed. (If there is any confusion about how to do this, hire a good technician instead. You don’t want to be a statistic with a damaged TV.) The TV’s signal source can come from many places such as the boat’s existing cable TV backbone, satellite TV receivers, and standalone digital TV antennas.
When using the coax backbone, digital on-air signals will be very good quality, and dockside cable TV will be adequate quality. If you’re using satellite TV, most are not high-definition systems. Your best option is to use an HDMI output from the receiver to feed the TV and the next-best resolution is the five-wire component TV connection. You will end up with a good quality signal about equal to 720p resolution.
You want to place the power and signal source connections as close as practical to the TV. In many cases you can place them behind the TV to hide them but sometimes that’s not possible. In our installation, since this was an aluminum arch filled with wiring and tubing, the outlets were placed below the TV in the coaming. The HDMI cable connection will need to be wrapped with electrical tape on the back of the outlet to keep it from vibrating out. The wiring to the TV gets covered with split loom and neatly tied up and harnessed behind the set.
6. Prepare TV for cruising. The TV should be restrained when not in use or during rough conditions. The best way to do this is with a couple of SS eyes and bungee cord. Your chartplotter is IP67 rated, but the TV isn’t rated IP anything so it needs protection from the elements. The low cost approach is to use a good quality plastic garbage bag. It’s not attractive, but it’s functional. The better-looking option is a TV cover, which are available online starting at about $25. Also, an Allen wrench will most likely have come with your mount—do NOT lose it. You’ll need it to remove the TV for storage over cold winters or in adverse weather. Finally, kick back and enjoy that game.