Outboard Cooling System Maintenance
By John Tiger
Outboard cooling systems are very simple and easy to maintain. They typically don’t offer trouble unless the owner doesn’t maintain and check them or abuses them by dragging the outboard through mud and sand which clogs the system.
THE COOLING SYSTEM & HOW IT WORKS
The system consists of:
Water intakes
Water pump assembly
Water tube
Powerhead water passages
Thermostats
Poppet valves
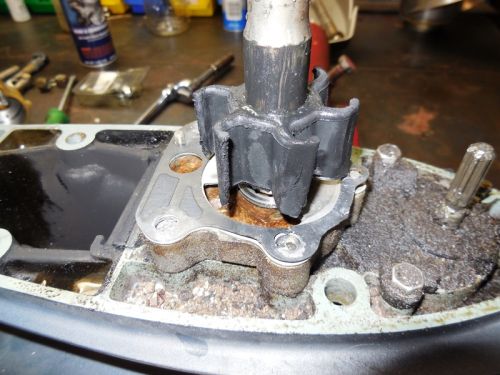
The water pump is the heart of the system. Typically located just atop the lower gearcase assembly, it’s easy to access and service. The pump typically consists of a rubber impeller that’s keyed to the engine driveshaft.
Water enters the lower gearcase through inlets carefully engineered and placed, usually on the sides of the gearcase, just above the propeller shaft area. The driveshaft turns the pump inside a plastic housing with a stainless steel liner. The pump then draws water through the gearcase intakes and up into the housing.
The impeller blades (vanes) touch the stainless steel liner at lower speeds as the driveshaft turns, but as the engine revs up, the impeller blades bend back away from the housing liner. The pump sends cooling water out of the top of the housing through a long brass tube, typically about a half-inch in diameter, up to the engine’s powerhead where it circulates through the system’s cooling passages and thermostats.
Salt, sand, mud, sticks, and other debris take their toll on the pump impeller, housing, and related parts. That’s why most outboard technicians recommend replacement every season, or at worst every other season. There are legions of stories that go “I’ve had my outboard for twenty years and never replaced the water pump”; however, good preventative maintenance practice includes replacement of the pump and housing at regular intervals.
BACKYARD MECHANIC: Replacing the Water Pump
Buy a factory service manual for your engine, so you can follow the correct procedure and use the correct parts. An hour or so is all it takes to remove the gearcase, replace the pump, and re-install the gearcase to the engine.
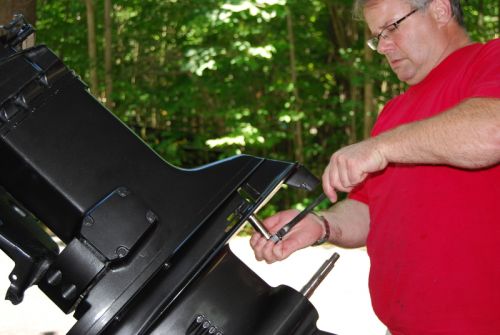
Gearcase Removal
On some outboards, the tricky part of the gearcase removal is disconnecting the shift shaft. For example, on most Mercury and Yamaha engines, the engine should be shifted into forward gear first. On many Johnson/Evinrude outboards, the service manual specifically denotes which gear the engine should be in to make removal and reinstallation easier. Temporarily removing the shift cable at the engine end will make things much easier as well, especially on engines where the shift shaft disconnection is inside the cowling. The engine should be tilted all the way up for gearcase removal.
Typically, there are two attachments on each side of the engine; on some, there is also a nut in the front. There are usually at least one or two hidden nuts or bolts up under the anti-ventilation plate (that flat plate just above the propeller). You may have to also remove the trim tab to access one of these attachment bolts.
If the bolts are frozen/stuck in place, be especially careful you don’t break them off. Use a propane torch to heat up the aluminum housing around the bolt (not the bolt itself), and firmly tap the head of the bolt with a ball peen hammer. You can also use penetrating lubricant. These actions will expand the threads, loosen up the hardened corrosion, and free the bolt so you can turn it out.
Before you completely remove that last bolt or nut, prepare yourself to catch the gearcase on the chance that it drops right out. Typically this won’t happen; it will usually require some wiggling and pulling to remove it, even with all the bolts/nuts out.
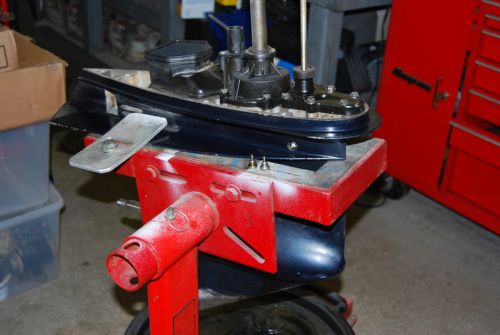
Stand It Up
The unit should be placed in a work stand. Clamping the skeg firmly in a vise will work fine, but protect the finish by padding the jaws of the vise with a rag or other soft material. With the unit secured, you can remove the old water pump.
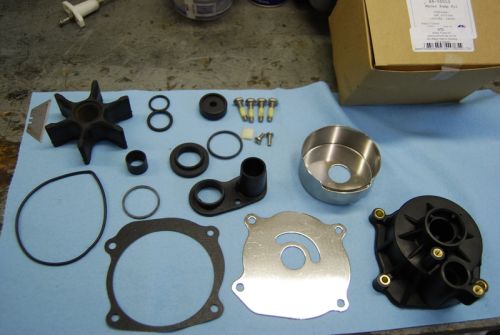
Replacement Tips
Follow the water pump replacement procedure in the factory manual carefully, paying particular attention to the cautions and warnings. Here are a few general tips that apply to all water pumps, regardless of brand or engine size:
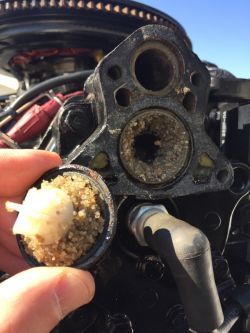
- Use compressed air to clear debris from the intake passages and the top of the gearcase surrounding the pump. When you remove the pump and the impeller plate, use the air gun with an extended tip to reach far down into the intake passages to blow out any accumulated sand and silt. Blow compressed air up into the brass water tube in the engine midsection to clear any debris.
- Use correct sealants when called for in the manual.
- When installing the impeller into the housing, be sure of rotation (clockwise); then, install the impeller into the housing while turning it so the blades compress in the proper direction.
- Use a dab of engine oil on the impeller blades when installing the impeller into the housing, so that it’s slightly pre-lubricated upon start-up of the engine when it’s all reassembled. Also, this makes compressing the blades into the housing easier.
- Carefully tighten the housing screws; do not over-torque, or you may crack the housing and cause a leak later, which could lead to overheating.
- After completing the pump installation, it’s a great time to drain, check, and refill the gear lubricant.
-
Water pump installation
Reinstallation
Remember that the gearcase must be in the correct gear before installation. Hopefully you didn’t move the shift rod at all while servicing the water pump. When reinstalling the unit:
- Clean the top of the drive shaft, then dab a small amount of marine grease on the splines—NOT on the top. Greasing the top may prevent the shaft from seating properly inside the crankshaft. Greasing the splines will make removal of the gearcase easier next time.
- Be sure the exhaust adapter is properly positioned in the midsection.
- While sliding the unit up into the midsection, ensure that the drive shaft, shift shaft, and water tube are positioned properly. Be especially careful that the water tube enters the top of the water pump properly; if it misses, the engine will not receive cooling water and will overheat.
- IMPORTANT, especially in salt/brackish water: Be sure to coat the threads and the shanks of each mounting bolt with heavy waterproof marine grease. This will ease removal next time you perform service.
After the installation is complete and you’ve reconnected the shift shaft and shift cable, start the engine and ensure that it is pumping water, running properly at the proper temperature, and shifting from neutral to forward and reverse correctly. Consider also servicing the engine’s thermostats at this time, so that the entire cooling system is refreshed and ready for service.
BACKYARD MECHANIC: Thermostats and Poppet Valves
These are easy to service. Simply locate them on the engine powerhead, remove the housing cover (again, be mindful of frozen/stuck bolts), and remove the old thermostats, poppet valves, springs, and rubber grommets. Clean all gunk and corrosion from the housing with compressed air and a dental pick, remove all old gasket material with a razor scraper, and replace the components per the instructions in your factory service manual.
OTHER TIPS AND NOTES
Some helpful tips when servicing your engine’s cooling system:
- If the old impeller comes out in pieces, and/or you see other debris (sticks, sand, mud), be careful to blow out all water passages with compressed air to dislodge any debris that could block water from passing through.
- Run the engine in the water, not on the hose, after you’re done and check the temperature at the cylinder heads with an infrared temperature gun. (These are available online or at any auto parts store for less than $30.) Check your service manual for proper operating temperature; most outboards run temperatures between 125° and 150° Fahrenheit.
- Ensure that the overboard water indicator (some call it the “pee stream”) is not blocked and is emitting a steady stream of cool to lukewarm water—not steam, not spurts.