Three Easy Coils
By Martyn Clark
A good sailor hates loose gear, be it rope, boat hook or bobby pins,” writes Hervey Garrett Smith, author of The Marlinspike Sailor. “He knows that at all times every item of gear not in actual use should be stowed away or secured.” In this article we’ll have a look at three different coils which will keep the lines aboard your vessel in shipshape and Bristol fashion.
Before we begin, a couple of reminders: almost all three-strand rope is laid right-handed and therefore should always be coiled clockwise or it will eventually kink or hockle. (By right-handed we mean that if you hold the rope horizontally in front of you, the strands will be running from top left to bottom right.) It’s always a good idea to coil the rope into your left hand and, if one end is made fast, always start with that end and work the twists and kinks out to the free end. Secondly, if you are going to store dock lines and spare rope below, it is always a good idea to hang them up in an orderly fashion.
The simplest solution is to install a row of heavy-duty cup hooks in the fo’c’sle or lazarette. Attach a short line to each hook with a clove hitch. A loop is put in at the other end (a bowline knot or eye splice), which is brought up through the coil when stowing and dropped over the hook. A far more attractive device—but a lot more work—is a toggle and becket secured to a bulkhead or shelf clamp through a wooden bracket as illustrated above. It can be made out of a short length of six-millimetre (1/4-inch) line, spliced tightly around a grooved wooden toggle (often used for flags) at one end with an eye splice in the other end. The toggle is brought through the coil and inserted into the eye splice when stowing—easily undone and no knots to tie!
The Sea Gasket Coil
This is a coil that comes down to us from the age of sail and is particularly useful for line that must remain in place. It was the coil of choice for square-rig sailors who laid aloft to loosen a square topsail or topgallant and needed to tie the gaskets up in a seamanlike manner that was both secure and easily undone. It could work well for a dock line that needs to remain attached: just lead it up and over a lifeline so that the coil can be made up below. It will also work for loose line as long as the upper part of the coil is secured and the weight of the coil below keeps pressure on the fastened end.
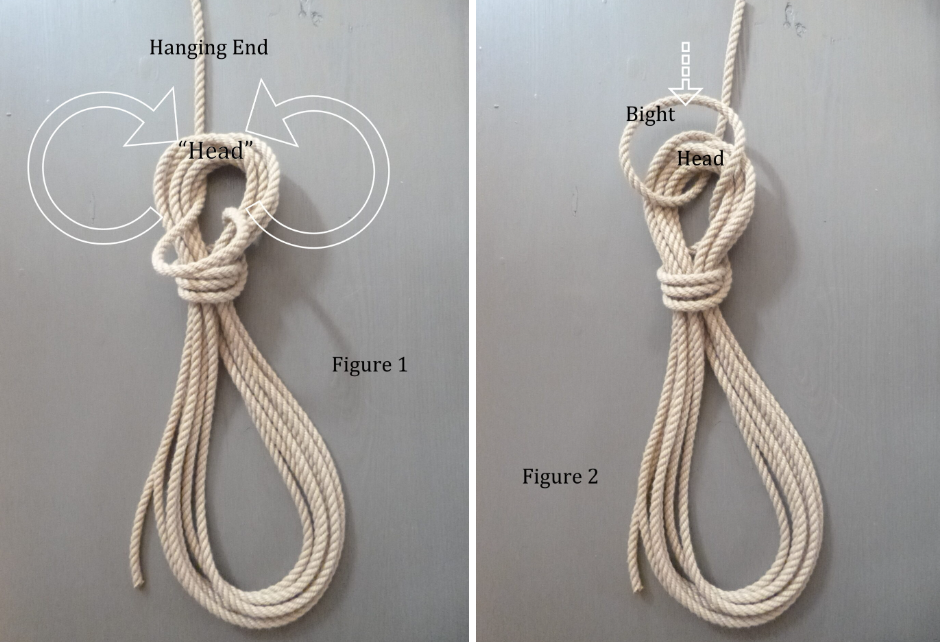
Figure 2: A bight is pulled through the coil after the last wrap and then brought up and over the “head” of the coil.
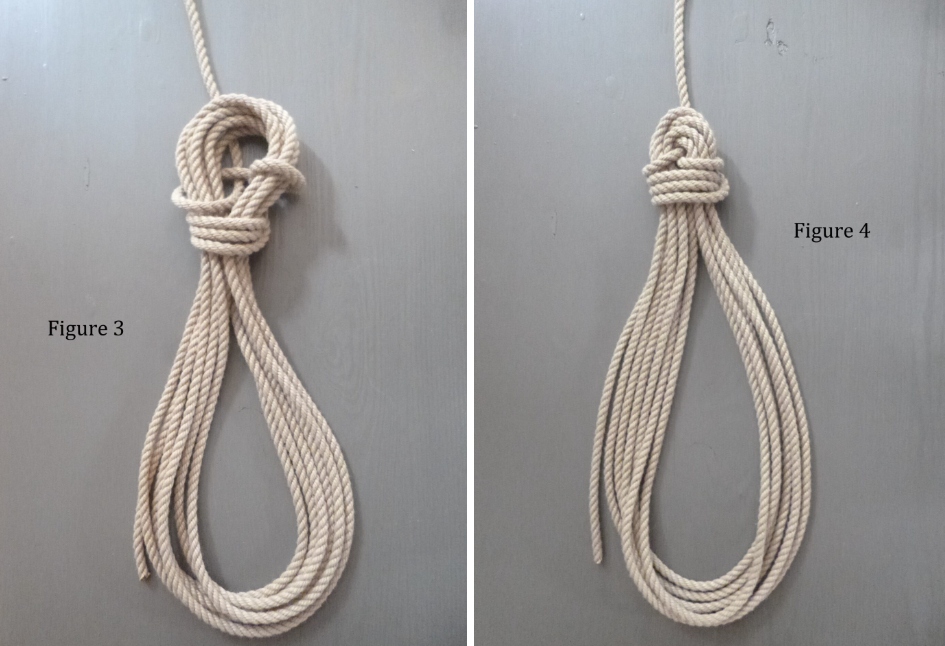
Figure 4: When the coil needs to be undone it is simply a matter of releasing the pressure on the bight and bringing it back up and over the head of the coil again.
Stowing Looped Coil
This is my favorite coil for loose line that needs to be stowed away.
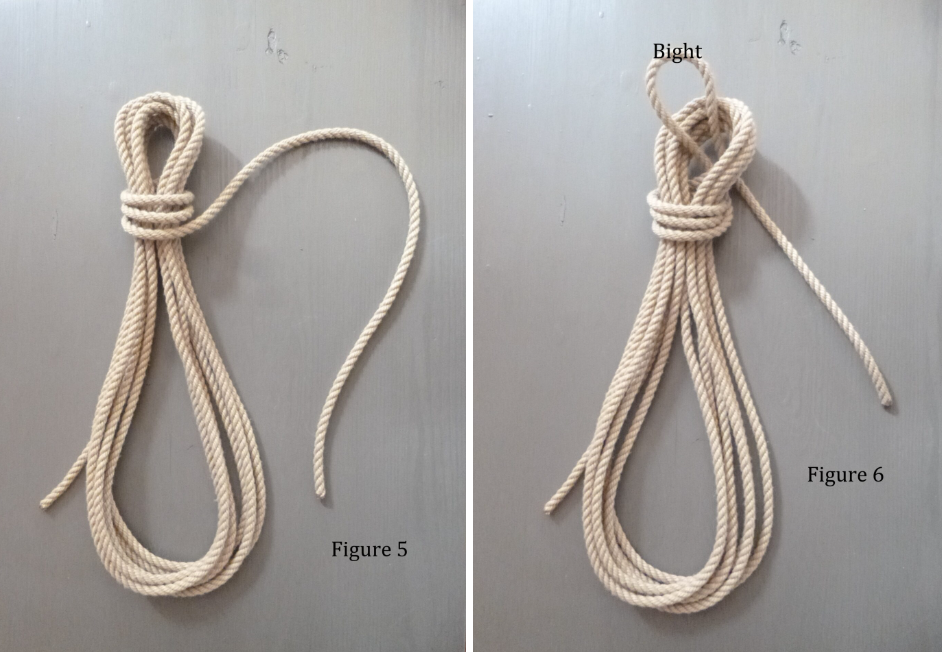
Figure 6: Then the end of the line is brought down over the “head” of the coil from the opposite side, pulled through the bight and then back up for hanging.
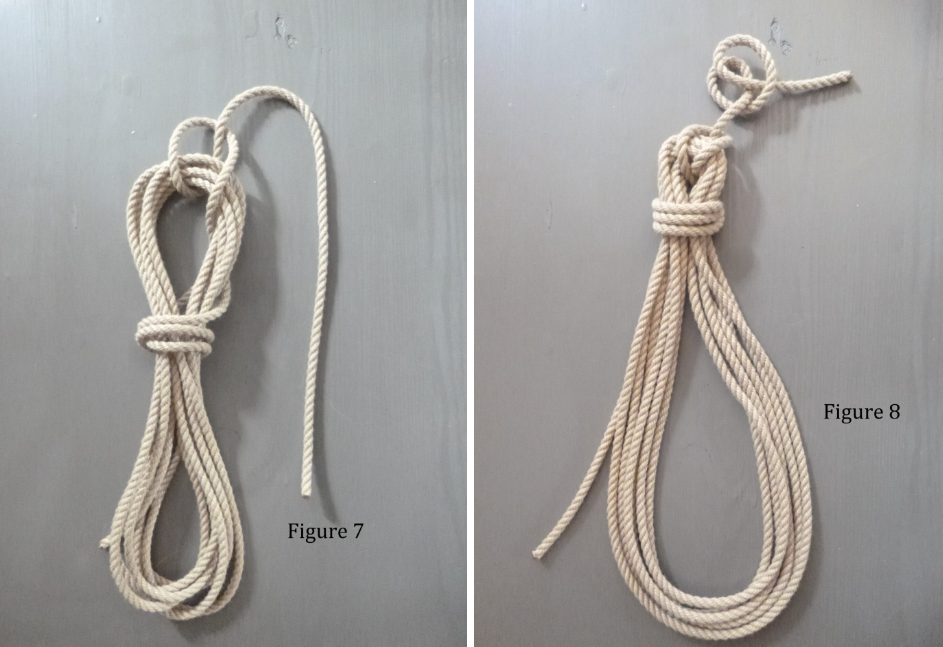
Figure 8: Hanging knot at the top.
Stowing Hitched Coil
This is a very secure method of preparing a coil for stowage.
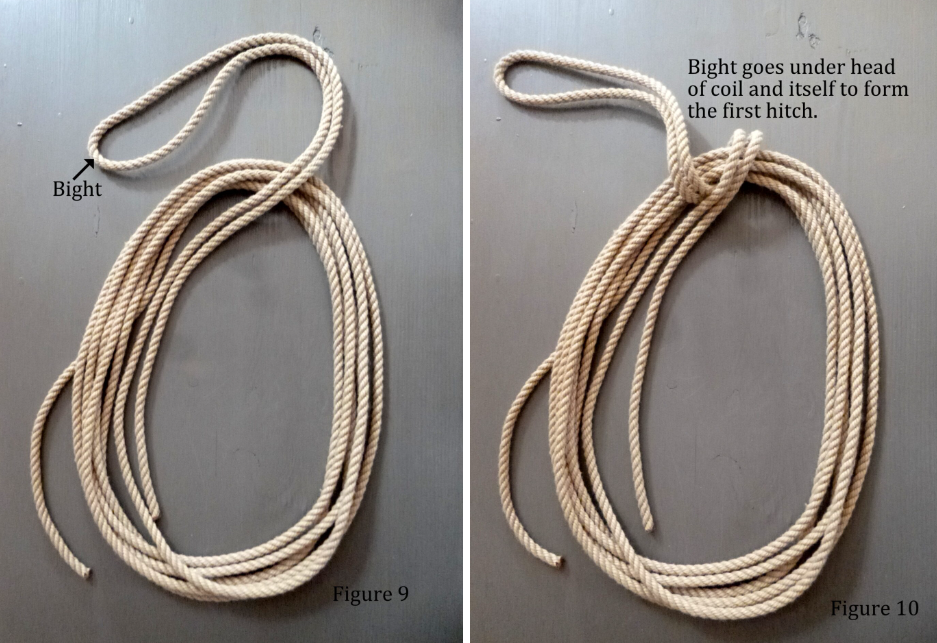
Figure 10: Bight goes under head of coil and itself to form the first hitch.
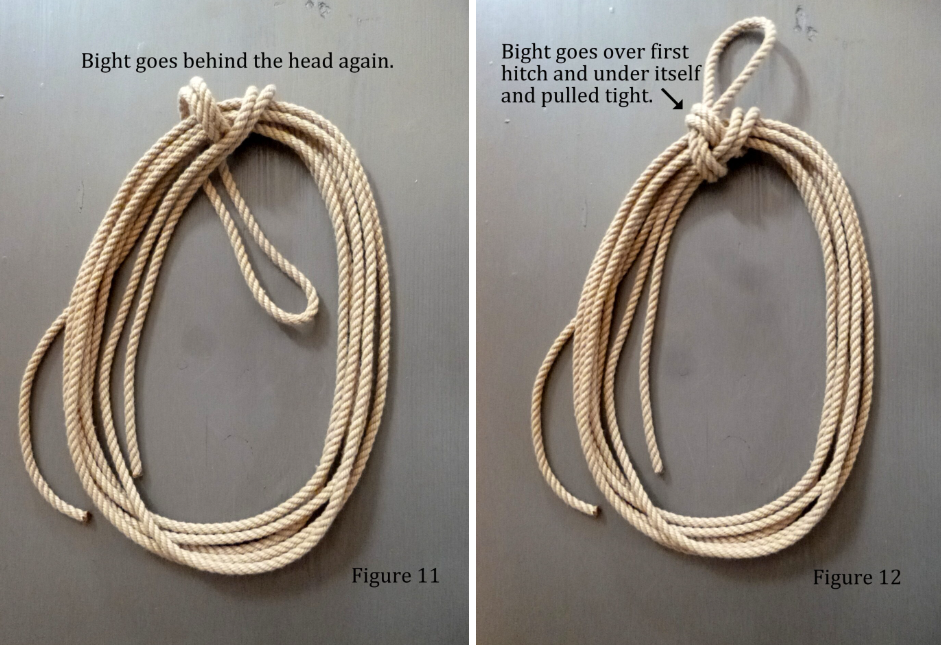
Figure 12: This looks like a clove hitch but it isn’t. Essentially you are taking one hitch tightly around the head of the coil to the right and then another hitch to the left. You even end up with a loop for hanging it up.