Tips on Winterizing Your Outboard - Part 2
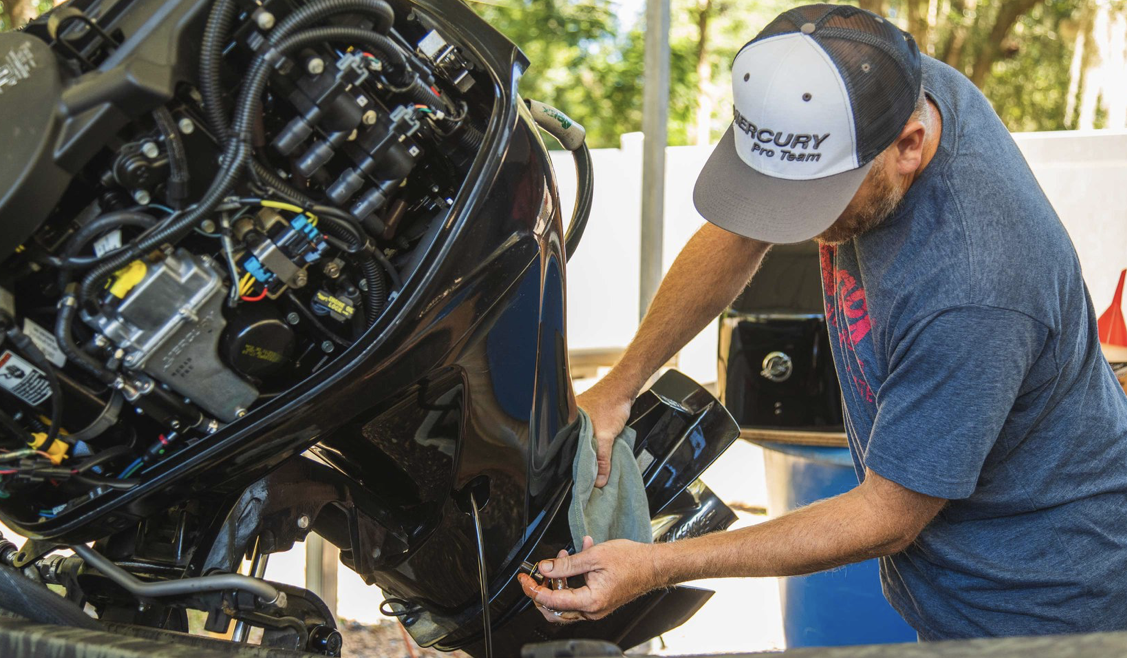
The gear lube in the outboard lower unit should be changed every 100 hours or once a season – check your owner’s manual for the specific service interval. Any water in the gear lube can freeze and expand during storage, potentially cracking the gearcase. As you drain the old lube, inspect it carefully for water intrusion.
Important Advice
If gear lube appears white or creamy, it may indicate the presence of water in the lubricant. This is an indication that the propeller shaft seal may be compromised and is allowing water to contaminate the lubricant, which could cause severe damage to the gears.
If water is suspected to be present in the gearcase, a pressure check of the gearcase should be completed by an authorized dealer. Refill the gearcase with fresh lubricant using a quality marine-specific product, following the instructions in your owner’s manual.
Check the Prop Shaft
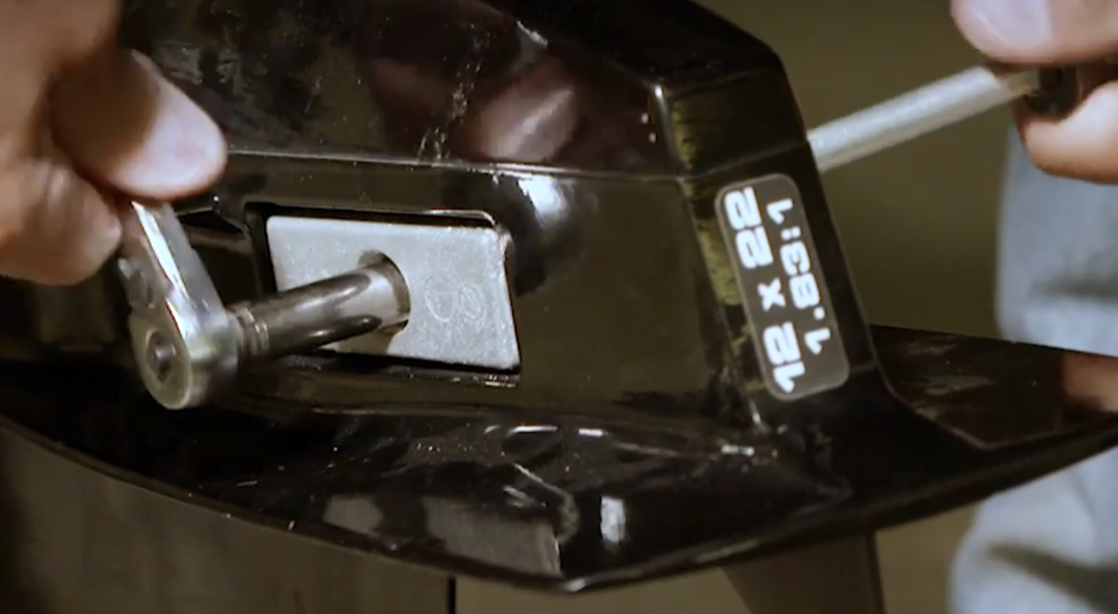
With some gearcases, you will have to remove the propeller in order to change the lube; but even if your engine doesn’t require that, it’s a good idea to pull off the prop. If your propeller is nicked or bent, the off-season is a good time to send it out for repair at a propeller shop so it will be ready to go in the spring. A dealer can often make arrangements for prop tuning or repair.

After removing the prop, check the prop shaft for fishing line. Remove the large thrust washer that is located behind the prop on some hub styles. The fishing line is often coated with grease and hard to see. Use a sharp pick or a small screwdriver to pull at the area around the prop shaft seal to loosen any line that may be present.
Over time, the forward thrust of the propeller presses the line into the rubber prop shaft seal. If the seal is damaged, water can enter the gearcase and cause significant damage.
If the propeller is in good condition, either reinstall it or store it separately from the engine to discourage thieves. Always coat the prop shaft with a quality marine grease, such as Mercury 2-4-C Marine Lubricant, before reinstalling the prop, and tighten the prop nut to the torque specification listed in the owner’s manual.
Check the Power Trim Fluid
Check your owner’s manual for specific instructions for your outboard model. You will probably need to tilt the engine all the way up to get to the pump.
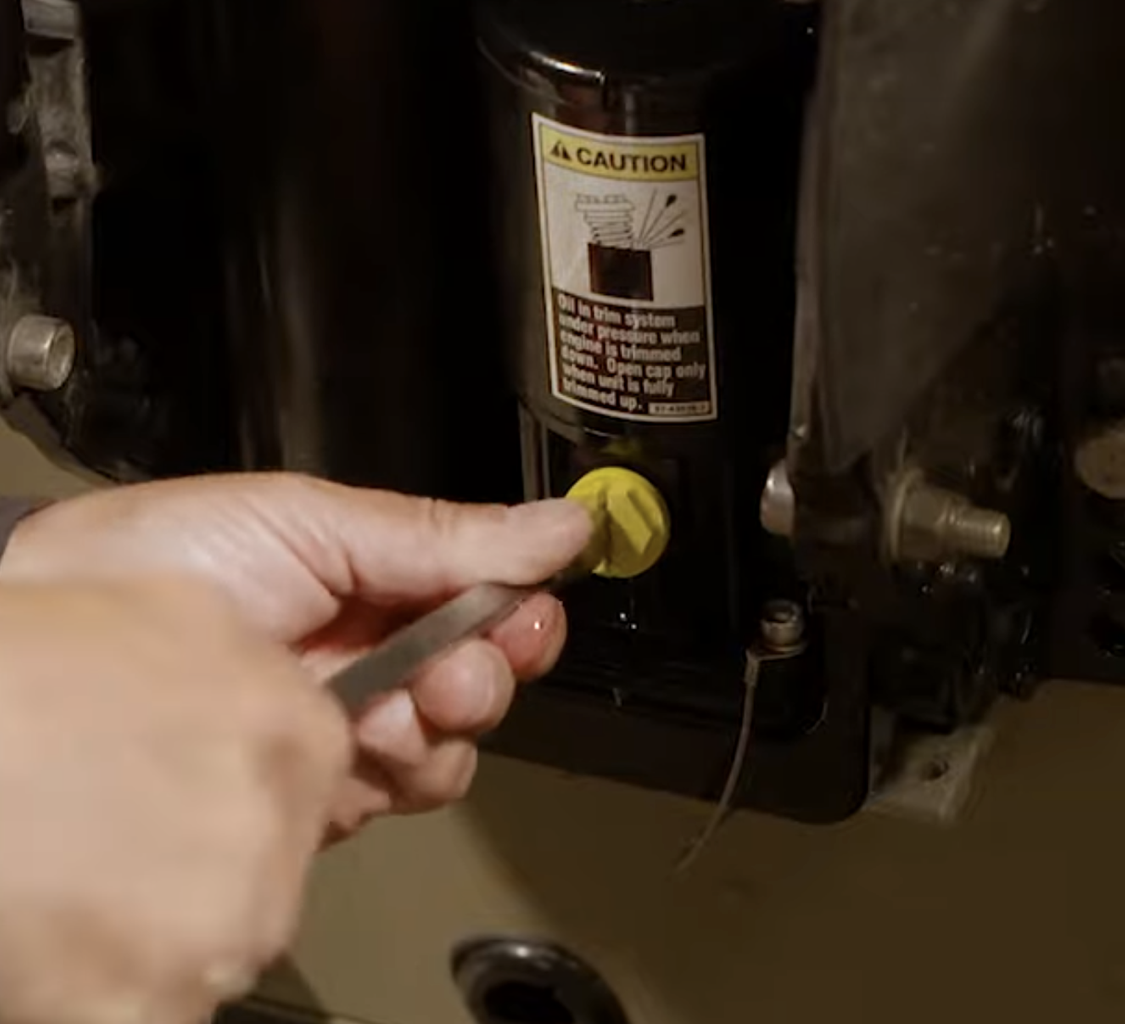
The fluid inside should be bright red; if so, check the level and top it off if it is low. Trim fluid that is pink or milky indicates the presence of water, which means there may be a leak somewhere in the system, and the trim pump should be inspected by a qualified dealer.
Check Sacrificial Anodes
Sacrificial anodes (or zincs, as they are often called) are designed to protect the motor’s other submerged metals from galvanic corrosion.
Most outboard motors have several sacrificial anodes, and they can be located by consulting the owner’s manual. Sacrificial anodes should be replaced when they are 50 percent deteriorated.
Lubricate Any Grease Points
Most outboards have some grease zerks or other lubrication points that should be serviced. Consult your owner’s manual to see where your outboard needs grease.
Coat the Powerhead
As a last step, the powerhead should be coated with a rust inhibitor product, such as Mercury Corrosion Guard. This is especially effective for motors used in salt water. It displaces water and forms a barrier to protect painted and unpainted surfaces from corrosion caused by salt water either on the powerhead or in the atmosphere. Corrosion Guard can also be applied to prevent corrosion from forming on the lower unit and power trim motor.
Touch up Any Nicks or Scratches
Inspect your engine’s lower unit and repaint any wear-and-tear marks. Most engine dealers carry a complete line of paint products – primer, color and clear coat – that are an exact match to the factory finish.
Check and Maintain the Battery
If it’s a lead-acid battery, inspect the fluid level and add distilled water, if needed. Be sure the battery is fully charged, remove it from the boat, and store it in a cool, dry place. Storing the battery on a maintenance charger will keep it charged and fresh until spring.
Whether the boat is stored on a trailer or a rack, the motor should be trimmed down to its vertical position so that any water remaining in the engine can self-drain. If water trapped in the engine freezes, it could cause serious damage.
Mice and Motors
In some situations, mice can be a problem – they may be able to get under the motor cowl and chew on wiring. Some dealers swear by this tactic: Fabric softener sheets, or drier sheets, are believed to repel mice. Just don’t forget to remove the sheet before you hit the water next season.
With the off-season storage procedure complete, your outboard will be protected for months. Come spring, getting back on the water will be a snap. Just reinstall the boat battery if it was removed, reinstall the prop, and turn the key. You should be ready for another season of fun and adventure on the water.