Twice as Nice: Installing a Second Battery
There are many good reasons to add a second battery or bank to a boat with only a single battery installed. Ask anyone that’s inadvertently drained his/her battery at anchor while listening to the stereo. With the turn of a switch, a captain has a fresh battery to start the engine and be on his way, instead of trying to find a Good Samaritan to give a jump or a tow. Here are some basic planning and installation tips to help make the project go smoothly.
The Right Type
The first choice that will be faced face is deciding on the type and size battery to install. If providing reserve cranking power when needed will be its primary function, one option may be to simply mirror the existing starting battery. If the goal is to power electronics and equipment while sailing or at anchor, a larger capacity deep cycle battery may be a better choice.
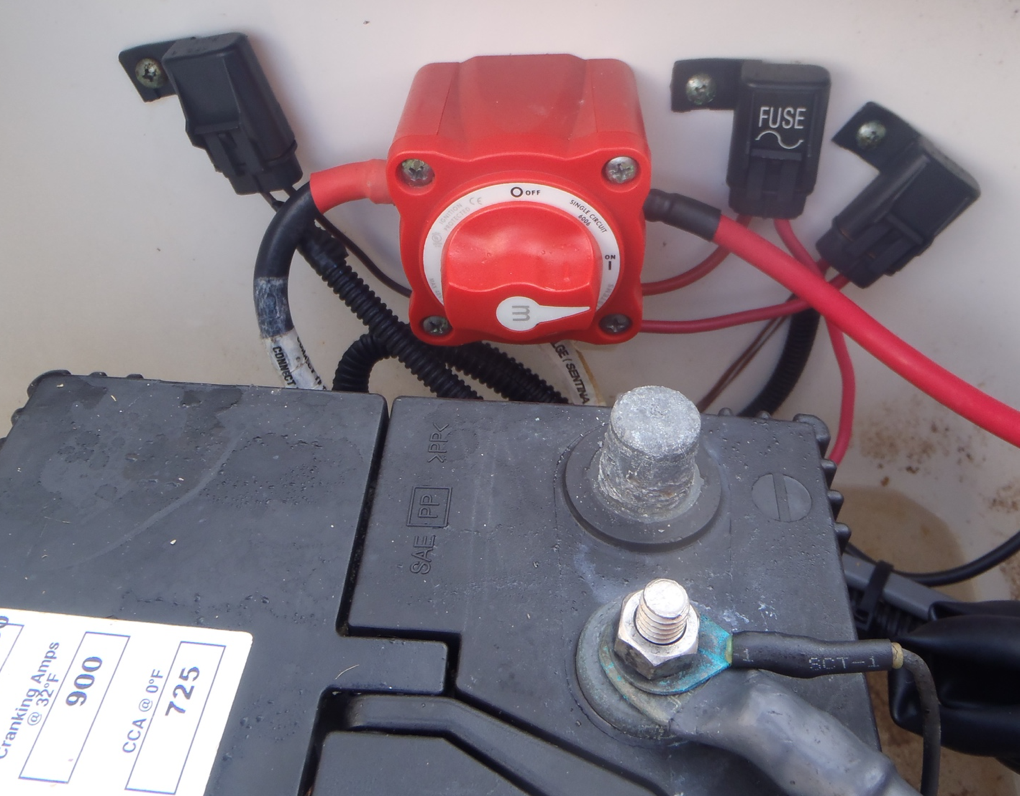
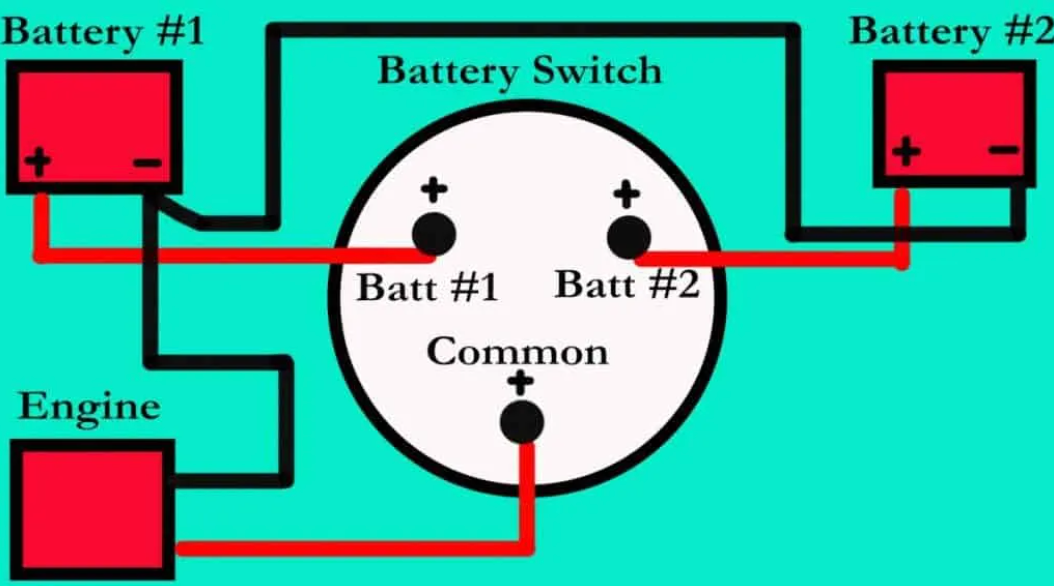
While simply adding a second battery in parallel to the existing battery would increase system capacity (effectively creating a single, bigger battery) installing a separate “house bank” provides the most benefit and greatest flexibility. A manual, dual-battery selector switch (such as those available from Perko or Blue Sea Systems) costs around $50 and permits selecting an individual battery for use, combining both batteries (for maximum capacity when needed) or disconnecting both when shutting down your 12 VDC system.
More complex switches and systems, with features such as automatic switching or charging regardless of switch position are available, but this basic setup is simple to install, reliable, and easily upgraded if needed.
Location, Location, Location
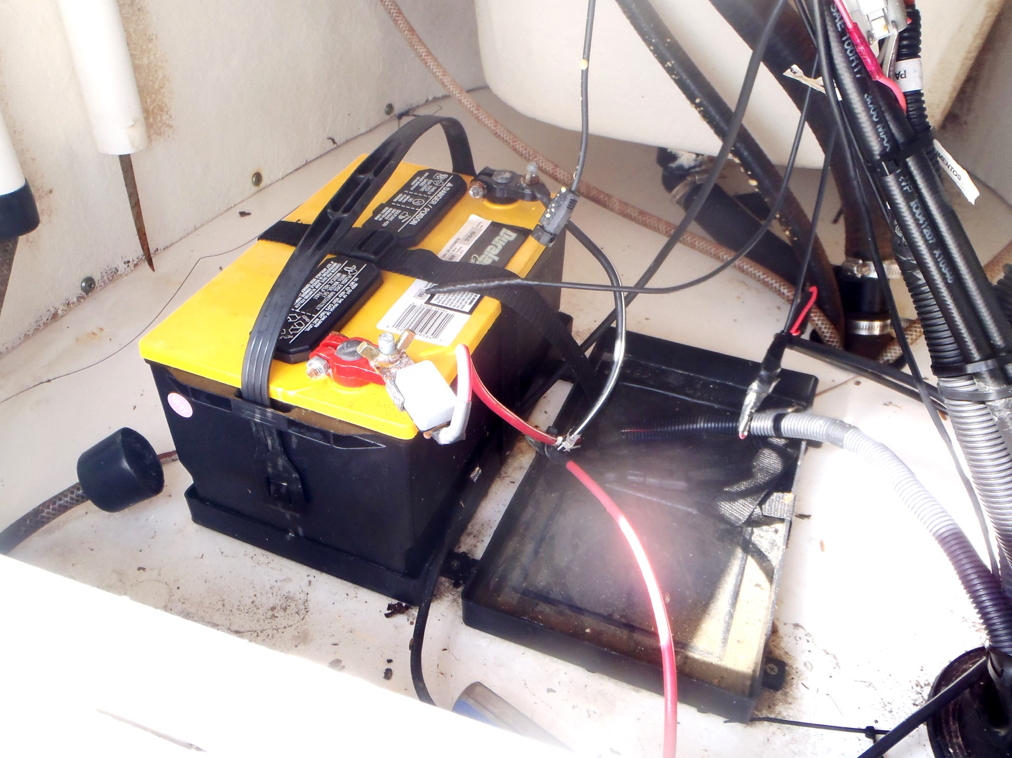
Next up is figuring out where to install the second battery. Ideally there will be enough room to mount it beside your existing battery. If that’s not possible, try to find a location that keeps battery cable runs as short as possible, is protected from the elements, reasonably cool, and has good ventilation.
Although engine compartments are probably the worst location with regards to coolness and ventilation, batteries are commonly located there by manufacturers due to reduced cable length requirements and convenience. If if will live in the engine cocmpartment, the best location is usually low in the engine compartment, but well above the normal accumulation of bilge water. This typically keeps the batteries away from mufflers or exhaust manifolds, while providing some benefit from the engine compartment ventilation system.
Other considerations include never mounting a battery directly above or below a fuel tank, fuel line connection, fuel filter or directly below a battery charger or inverter.
Installation Basics
Section E-10 of the American Boat & Yacht Council’s (ABYC) “Standards And Technical Information Reports For Small Craft” covers battery installation requirements in great detail. Although there may be some minor differences in installation requirements between the various types of batteries (wet cell, AGM, etc.), the following are some general requirements to keep in mind.
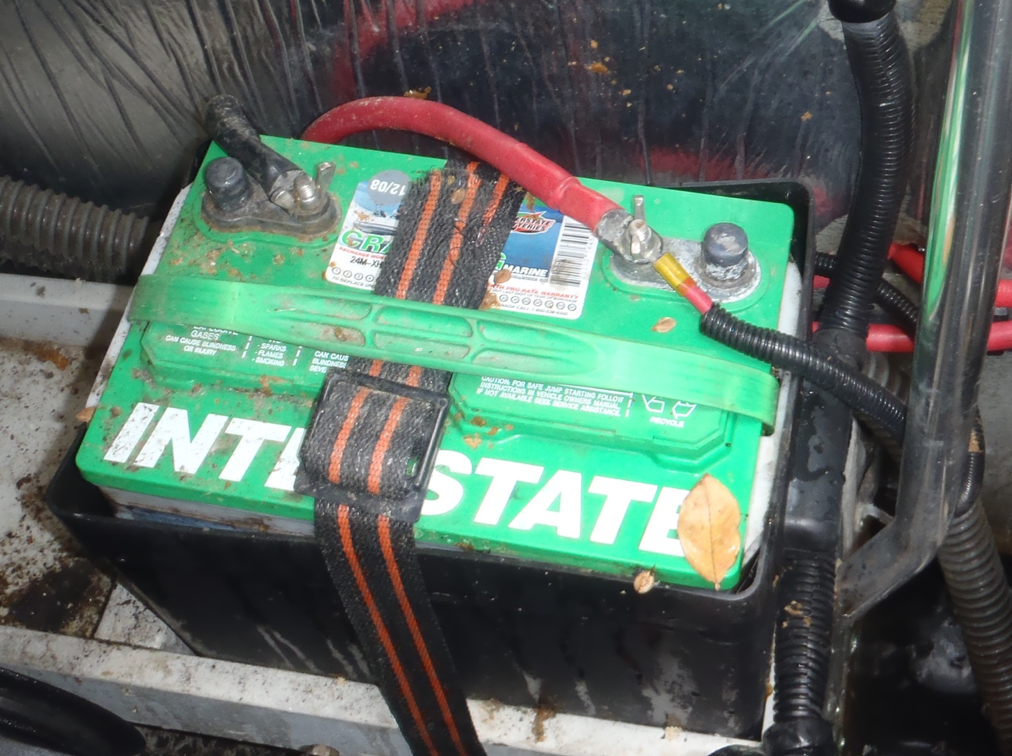
Batteries should be installed in liquid tight/acid proof battery trays or boxes. These containers can be store-bought or homemade, as long as they are acid proof and liquid tight. Also keep in mind that they do not have to be able to contain all of the battery electrolyte — only spill over. Batteries are also required to be secured against movement (one inch max in any direction for at least one minute) when exposed to 90 lbs. (40.82 kg) of pull or twice the weight of the battery, whichever is less.
All positive terminals must also be covered to prevent accidental shorting (from dropped tools, for example) a requirement that can be satisfied by the use of rubber terminal caps or boots, non-conductive covers or by the lid of a battery box. For wiring, purchase pre-manufactured battery cables or fabricate a custom set. When making a custom set, always use marine grade, low resistance tinned copper wire and connectors to reduce electrical resistance and corrosion.
Terminal connectors must provide secure mechanical and electrical connection, meaning no spring clips or alligator clamps. Wing nuts are also prohibited for battery cables and other conductors size 6 AWG and greater — they’re difficult to properly torque and can work loose due to vessel movement. If provided by the battery manufacturer, replace them with marine grade lock nuts.
Finally, if making your own cables, do yourself a favor and purchase a proper crimping tool to install the connectors. Not only will the installation look more professional than using a set of Vise Grips® or a hammer to pound them on, you’ll avoid the problems associated with loose connectors later on. Spraying a corrosion inhibitor (such as Boeshield) into the connector prior to crimping, and adding a length of adhesive-lined heat shrink tubing afterwards will also reduce corrosion and future issues.
Final Tips
Stay consistent. When installing a second battery don’t mix different types, such as having an AGM for battery one and installing a wet-cell or flooded type for battery number two.
Safety first. Batteries contain a huge amount of potentially dangerous, stored energy. When installing a second battery (or anytime major work is done on the DC electrical system) always remove battery cables from the positive battery terminals. These should be connected last and as current flows from negative to positive, install the positive terminal first, then the negative one.
By Capt. Frank Lanier
Captain Frank Lanier is a SAMS® Accredited Marine Surveyor with over 40 years of experience in the marine and diving industry. He’s also an author, public speaker, and multiple award winning journalist whose articles on seamanship, marine electronics, vessel maintenance and consumer reports appear regularly in numerous marine publications worldwide. He can be reached via his website at www.captfklanier.com.