‘Tis the Season for Outboard Repowering
There is no time like the present to bite the bullet and repower your outboard
boat. The trick is finding the right horsepower, stroke, fuel system, shaft
length, props, engine brand, price, warranty and installing dealer. Probably
the most difficult decisions are deciding on the horsepower, brand and installing
dealer. BoatTEST.com can help you with the first two – horsepower and brand selection.
We have tested hundreds of outboard boats from 25-hp to 350-hp powered by all major
brands. Find the boat models like yours and compare performance under different
loads and conditions and with different props. Then visit your local dealers
for the two or three brands you have selected and quiz them on the price, installation
costs and timing, and on-going operating costs. To better acquaint you with what
is involved with a repowering installation job – and to help you decide whether
or not you will do it yourself – check out our Outboard Installation Primer.
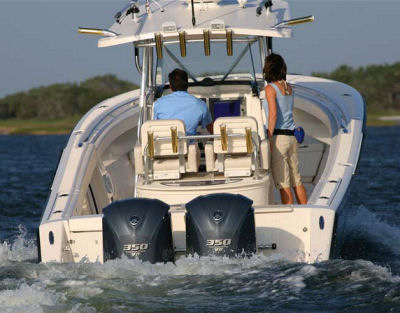 There is nothing worse than an under-powered boat. When the couple above repowered, they obviously weren’t taking any chances. But are they over-powered? |
Installing an outboard motor (or, “rigging” in boating industry-speak) involves
not only bolting the outboard to the transom, but can also include connecting the
steering system, wiring harnesses, throttle and shift controls, and instrumentation.
This is an overview of what goes into rigging a new boat, so even if you don’t tackle
the job yourself, you’ll at least know what you’re talking about.
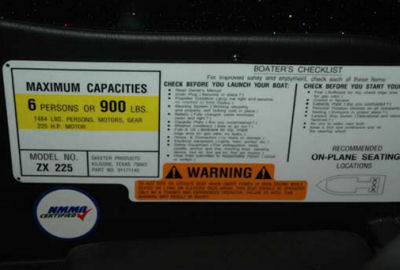 Check the capacity plate for the maximum horsepower allowed for your boat and DO NOT exceed it. |
The Power
The outboard must be the proper horsepower
for the boat and for the application. Read the manufacturer’s maximum hp allowed
on the capacity plate, and be sure you select the correct shaft length (15, 20,
25, or 30 inches) for the boat’s transom height.
WARNING – Do not install an outboard with more
horsepower than stated on the capacity plate on the boat. Not only is it against
the law to install a larger engine than the boat’s rating, it is also downright
dangerous. If the boat doesn’t have a capacity plate, contact the manufacturer to
determine the maximum horsepower rating for the vessel.
|
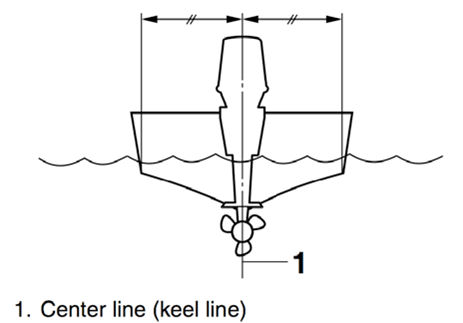
Placement
An outboard is mounted on the center of the
transom, in line with the keel or centerline of the boat, and is usually secured
to the transom with four stainless steel bolts. Many transoms of outboard boats
have plywood cores. If this is the case with your boat, talk to the manufacturer
or you boat dealer about the best way to protect the core from rot.
Very large outboards may require six bolts, while very small outboards may not require
any at all, as they are usually clamped to the transom using the screw-style clamps
integral to the bracket. Outboard height – where the prop shaft is located in relation
to the bottom of the boat – is critical, because if the outboard is too high, the
propeller can ingest air from the water’s surface and lose its grip (ventilate).
Or, if the outboard is too low, the prop and gear case will be farther below the
boat bottom than necessary, creating excessive drag and resulting in poor performance
and handling. A rule of thumb is to install the outboard so the anti-cavitation
plate (horizontal flat metal part at the top of the gear case) is even with the
bottom of the boat. This setup should work well on most pleasure boats with moderate
horsepower engines.
 Once installed hydraulic steering is generally less problematical than cable steering. |
Steerage
There are three types of steering systems currently available: single cable steering
for mid-size engines on boats capable of modest speeds, and either dual cable steering
or hydraulic steering setups on high horsepower/high speed applications. Hydraulic
steering systems are most common in applications 150-hp and up.
As the outboard is being installed, the steering cable(s) will probably be fastened
to the outboard before it’s bolted to the transom, because on many boats the outboard
well opening isn’t wide enough to allow the steering cable(s) to be attached with
the engine in place. However, hydraulic steering components can be usually added
after the outboard is attached to the boat (flexible hoses instead of cumbersome
cables), simplifying the rigging process immensely.
Wiring
Each outboard maker has a slightly different wiring system so you will have to follow
the instructions for the manufacturer. As an example, Yamaha’s is made of three
basic sections: a pair of heavy-gage cables to conduct battery voltage to the engine
and charging voltage from the engine to the battery; a main wiring harness (harness=bundle
of wires) that connects the outboard to the remote control box and ignition switch;
and an instrument harness that sends information from sensors on the outboard and
in the boat to the gauges in the dashboard.
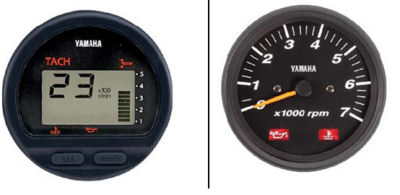
Digital read outs are generally easier to install
than analog.
Instrumentation
You have a choice from two types of instruments: analog or digital. Analog gauges
haven’t changed a great deal in decades, requiring that each gauge be hard-wired
to its individual sending unit, as well as to a power source. These traditional
instruments work pretty well and aren’t particularly expensive. However, since analog
gauges need so many dedicated wires and connectors, the opportunity for failure
over extended periods of time can be high.
Digital instruments use the outboard’s engine management computer to process information
from the various sensors (boat and outboard) and display the outputs almost instantaneously.
Wiring these high tech devices is simply a matter of plugging sensor leads into
a central wiring harness –digital really does mean plug-and-play.
Given the versatility of integrated microprocessor circuitry, each digital gauge
is capable of performing multiple functions, allowing boaters to fine-tune the readouts
– showing what is important to them and hiding what isn’t. Granted, digital gauges
cost more up front, but the payoff can more than offset the initial investment.
Remote Controls
With the exception of tiller-steer outboards (where the throttle and shift controls
are on the handle), your new Yamaha outboard needs a remote control box – a unit
that often incorporates an ignition switch, an engine stop switch, and throttle
and shift functions. In addition to the main wiring harness (from the outboard to
the remote control box), the throttle cable and shift cable will need to be attached
to the throttle/shift handle near the driver’s seat on one end, and to the throttle
and shift linkages on the outboard at the other end.
Pre-Rigging
Routing wires and control cables throughout a boat can be a daunting task, and that’s
why many manufacturers install the wiring harnesses and cables as the boat is being
assembled, a process known as “pre-rigging”. For example, if a builder knows a certain
series of boats will be using Brand -X outboards, those boats will be pre-rigged
with Brand-X controls, wiring and instruments to speed up the process when it comes
time to mount the engine.
As You Can See …
There is more to rigging a boat than hanging an outboard on the transom; it’s a
lot of work that most of us aren’t equipped to do. Fortunately, the outboard engine
makers have hundreds or thousands of dealers across the U.S. that would be glad
to help rig your boat – particularly if you buy the outboard engine from them. Before
you repower your boat or select an engine for your new boat, make sure your selection
is well considered. Check BoatTEST.com’s performance tests for the brands you are
considering on the boat models, or boat sizes you are considering. Talk to your
dealer about installation and what he will charge to do the job for you.
You will probably only repower your boat once, make sure you do it right.
[The above guide to outboard re-powering has been produced by Yamaha Motors
as a public service and edited by BoatTEST.com.—Ed.]